How To Grow

How To Plant, Grow And Care For Quinoa

Source : facebook

Quinoa has become an increasingly well-known grain used in our kitchens and restaurants over the period. It's also a rising star in gardens. It is easy to grow from seeds planted directly in the soil.

Quinoa plants produce big, fluffy seed heads that are packed with tiny red, white, brown, and black seeds. In this guide, you will find out the key measures needed to plant quinoa, the type of environment recommended for the plant, and how to take care of this plant. 

Where and When To Plant Quinoa

Light

It is most productive when it receives at least 8 hours of direct sunlight a day. Like other crops, it needs full sun to flower and mature. Plant it away from trees and buildings, casting shade throughout the day.

Watch how sunlight gracefully moves through your garden, and choose spots that provide the perfect balance of light and shade for your plants, ensuring their happiness.

Spacing

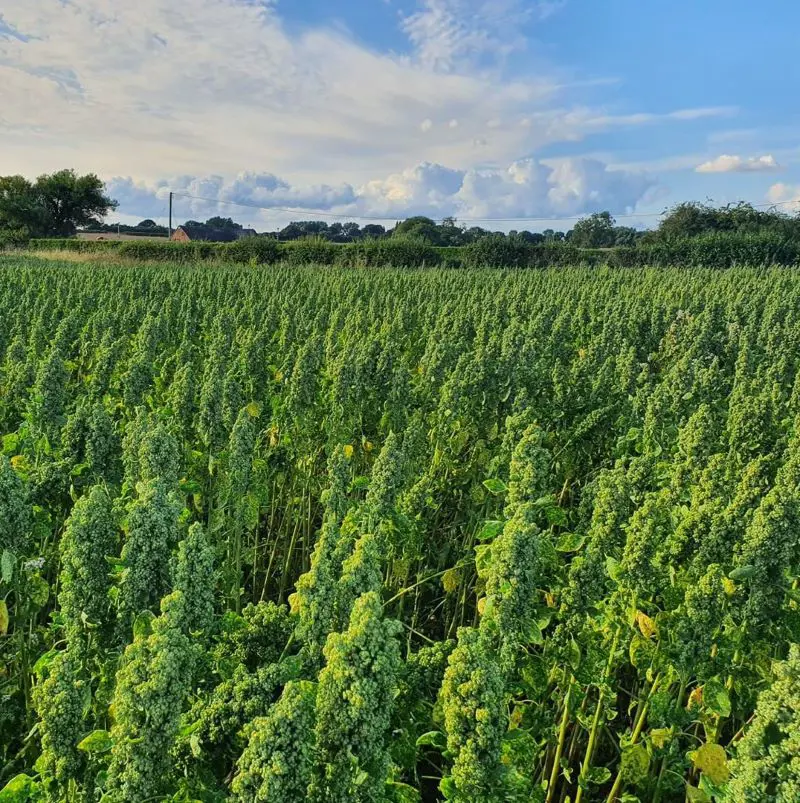
When spacing your quinoa plants, keep one to two feet between each row. In a row, keep space for each seed about 2 inches apart, and plant them about 1/4 inch deep. Once the seedlings have a few inches of height, thin them so that there is a foot of space between each plant.

The plants should be staked, especially in areas that get severe thunderstorms and strong winds. These plants can become top-heavy as they mature. 

Soil

Quinoa produces the most grain in well-drained, fertile soil. Yield decreases slightly when it is planted in average and infertile soil, but the yield difference is minor. Quinoa tolerates poor soil well.

When supplied with proper moisture at planting time and when the young seedlings are maturing, they will grow and produce a good crop. Water quinoa during dry periods and low soil moisture.

Planting Time

It is sensitive to cold climates. The seeds can be planted directly after the danger of the last winter season has passed, or you can start the seeds indoors a few weeks before your last winter date.

It is also sensitive to high temperatures so give the plants as much time in the ground as possible before risking high temperatures.

How To Grow Quinoa: Step-By-Step Instructions

Step 1. Selecting the Right Variety

Source : facebook

Quinoa is native to the Andean region and grows in cool climates, but it can grow to different environments. Select a species that matches the climate in your region. Varieties like 'Kaslala' and 'Temuco' are suitable for cooler areas.

'Cherry Vanilla' or 'Red Head' grows better in warmer areas. Study the maturity period of the variety you choose, typically ranging from 90 to 120 days.

Step 2. Preparing the Soil

It cannot tolerate waterlogged situations in your space, so well-draining soil is important. The soil needs to be a pH of 6.0 to 8.5 for ideal conditions.

Test your soil before planting quinoa and adjust the pH if necessary using lime to raise it or sulfur to lower it. Proper soil conditions are necessary for proper health of the plant and air circulation.

Step 3. Planting the Seeds

Quinoa is tolerant to cold and prefers to adapt to cooler weather. It is best time to plant in early spring, just after the last winter date in your area.

The soil temperature should be around 60°F for proper development of the plant. In moderate climates, it can also be planted after the summer season for a fall harvest. Choose suitable conditions according to the climate for better results and healthy plants.

Step 4. Water and Care

To plant keep the soil consistently moist until the seeds start to germinate, in a duration of 4 to 10 days. Once the plants are properly developed, It is tolerant to drought.

Water deeply from time to time, allowing the soil to dry out. Keep the weeds out of the plant to avoid nutrient deficiency. Apply a layer of mulch of organic to maintain moisture and suppress weeds.

Step 5. Fertilization

Source : pexels

Quinoa plants usually don't require much fertilization like other plants, especially if you have added compost to the soil at the proper level.

If necessary, use a balanced organic fertilizer. Do fertilization during the growing season of the plant for proper out of the quinoa plant. Too much nitrogen can lead to lush foliage during seed production.

Step 6. Monitoring Growth

This plant grows best in temperatures between 59-68°F, but it can handle some heat and light frost. It is relatively pest resistant but watch for some pests like aphids, leaf miners, and mildew.

Using row covers can help prevent insect damage. Thin the plants to ensure proper spacing for airflow and sunlight to keep prevention from pests.

How To Care for Quinoa

Watering 

Keep the soil consistently moist during the germination period, for a duration of lasts 4-10 days. Avoid waterlogging the soil, as this can lead to seed rot. Once the plants are established, it become tolerant to drought.

Water deeply from time to time, allowing the soil to dry slightly between waterings. Overwatering can cause the root rot and other problems. Water checking the soil moisture.

Fertilizing

Plants usually don’t require more dense fertilization, if you’ve applied the soil with compost before planting. If your soil is poor, you can apply a balanced organic fertilizer according to the requirements of the plant.

Too much nitrogen can cause excessive leaf growth with decreased food. Apply fertilizer when the plants are about 6-12 inches tall if needed.

Weeding

It can be surrounded by weeds. Check regularly, especially during the first few weeks of growth. Applying a light layer of organic mulch around the plants can help avoid weeds and retain soil moisture.

Be careful not to cover the young plants with mulch. Weeds can also absorb the nutrients that are required for the quinoa plant to grow.

Thinning

Once the seedlings are developed about 4-6 inches tall, keep them 6-18 inches apart. This spacing helps to make enough room for proper air circulation and sunlight exposure and helps to prevent the risk of diseases. If you don’t want to waste the thinned plants, you can transplant them to another part of your garden.

Pest and Disease Management

Search for aphids on the leaves and stems of the plant. If you find them, you can spray the plants with a mixture of water and insecticidal soap or introduce natural predators like ladybugs. These pests settle into the leaves, causing damage. Remove and destroy any affected leaves to prevent the spread.

Monitoring Growth

Check your quinoa plants regularly for signs of any problems, such as yellowing leaves, stunted growth, or pests exposure. Early detection of problems makes them more easy to handle.

It prefers cooler temperatures, so in warmer climates, consider planting in an area that gets light sun during the hottest part of the day or any materials to create shade.

Transplanting Quinoa

Timing

The onset of spring's gentle warmth provides the perfect occasion for transplanting quinoa. This period, just as frost yields a mild climate, creates optimal conditions for rooting and early growth. 

Spacing

Source : facebook

When you're ready to transplant your quinoa, leave about 1-2 feet (30-60 cm) between each plant. This will give your quinoa plenty of space to grow smoothly and is ideal for the yield.

Soil Conditions

It loves proper draining soil, so choose something like sandy loam or clay. Before planting, apply soil with a base fertilizer like composted manure. This helps your quinoa get the optimal nutrients for its growth.

Location

For the best results of the plant, choose a location for your quinoa that receives full sun for most of the day. This ensures your quinoa gets the sunlight it needs, but also some shade to avoid overheating.

Harvesting Quinoa

Harvesting Time

Source : pexels

Quinoa seed is ready to harvest when the seed coat is barely dented by a fingernail. Plants are completely dry and the leaves drop when the seed is mature. Depending on the panting time, it can be harvested in August or September. Most varieties of quinoa are ready to harvest about 90-100 days after planting.

Harvesting Process

Harvest quinoa by hitting the flower stalks against a hard surface or rubbing them between your hands to separate the seeds from the flower parts or chaff. Next, clean the harvested seed by removing the chaff.

Spread the seed onto a cloth and position a fan nearby. Turn on the fan and the moving air will blow away the lighter chaff. It’s often necessary to remove large chaff by hand. 

Storing Quinoa

Keep quinoa in an airtight container in a cooler place for long-term storage. It can also be stored in a paper bag at room temperature for three to six months. It’s necessary to remove the soap-like coating, called saponins, on the quinoa seeds before cooking.

Remove saponins by repeatedly soaking the seed and rinsing it with water until soapy bubbles are no longer present. Instead of soaking, the seed can also be cleaned by rinsing it under fast, hot running water multiple times. 

What is Quinoa?

Source : pexels

Quinoa is an ancient South American grain that was largely ignored for centuries. Interestingly, it was only recently noticed by the rest of the world and hailed as a “superfood” due to its high nutritional content. It is now considered a specialty food by foodies and the health-conscious.

Types of Quinoa

Many seed companies now offer quinoa seeds in their catalogs. While there are many varieties available, Cherry Vanilla and Brightest Brillant are the two most widely grown in home gardens. They’re reliable, productive, and adaptable to various growing conditions.

Cherry Vanilla

This variety is incredibly ornamental with plants that grow three to five feet tall. It’s a good choice for containers if you wish to plant in pots. The eye-catching seedheads range from pale pink to deep fuchsia, making this crop pretty enough to be tucked into flower beds and borders as well as the vegetable garden.

Brightest Brilliant

Expect to be wowed by the dazzling shades of Brightest Brilliant quinoa. The four to six foot tall plants are topped with seedheads of red, orange, pink, cream, and even gold. Enjoy the young leaves raw or cooked but don’t pluck too many if you want the plants to gather enough energy to yield a large crop of seeds.

Some other varieties:

White: White quinoa is the most common and the most versatile quinoa to use. The largest of the quinoa varieties, it has a mild, grassy flavor and a creamy texture. It has the best texture, it's super light and fluffy, and has the most versatility. It can be used as a replacement to rice, it can be used as a base for grain salads, baked goods and so much more. 

Red: Red quinoa is chewier and smaller than white, with a nutty flavor. The next most common form of quinoa is red quinoa. Red quinoa can be used just like white quinoa in most cases. It's great in salads, grain bowls or as a rice replacement, but not so good in baked goods. The texture of red quinoa is super crunch, it has a nuttier flavor.

Black: Black quinoa has the most pronounced flavor and remains firmest when cooked. Black quinoa would be considered the most “rare” kind of quinoa. Black quinoa is super similar to red quinoa. It's crunchy, it's nutty, and I'd use it in the same applications as I'd use red quinoa.

Tri-Color: Tri-color quinoa is simply a combination of white, red, and black quinoa types. The last type of quinoa in its whole form is rainbow or tri-color quinoa. Rainbow quinoa isn't actually its a real quinoa. It is a blend of all three colors above. It's sold as a mix of white, red and black quinoa.

Pests and Diseases

Pests

Source : facebook

Quinoa is related to spinach, chard and beets, thus many of the invertebrate pests that infect these crops will also reduce the production of quinoa.

Beet armyworm (Spodoptera exigua)

In the Northern regions of the US, generally 2 to 3 generations of beet armyworm larval emerge during the growing season. These caterpillars can destroy seedlings by consuming leaves and petioles.

Bertha armyworm (Mamestra configurata)

Quinoa is a secondary plant host to the Bertha armyworm caterpillar. Early larvae stages are vulnerable to weather. These pests can be mistaken for Diamondback moth larvae.

Goosefoot groundling moth (Scrobipalpa atriplicella)

Producing two generations per year, the Goosefoot groundling moth caterpillars feed upon foliage and panicles. Uncontrolled, this pest can annihilate this crop.

Stem-boring Fly (Amauromayza karli)

As the name suggests, the larvae of the stem-boring fly burrow into the stem where it feeds. They can severely reduce yields and cause plant death.

Diseases

It is related to spinach, chard and beets, and many of the invertebrate pests that infect these crops will also affect the production of quinoa.

Passalora leaf spot (Passalora dubia)

Quinoa affected with this fungus will have dark, oval-shaped lesions with reddish-brown margins appearing on the leaves. Passiflora leaf spot spores can be spread by the wind and overwinter on plant debris. Weeds, such as lambsquarter, also host this fungus. Avoiding overhead irrigation helps control this disease.

Downy mildew (Peronospora variabilis)

Cool, damp weather encourages the growth and spread of downy mildew. This fungal infection can be known through the grayish color on the leaves of your plant. Yellowish-pink areas can also appear on the upper side of foliage.