How To Grow

How To Plant, Grow And Care Asparagus Fern

Source : instagram

Asparagus fern is well-loved for its delicate, feathery foliage and green color. It makes a stunning addition to any indoor or outdoor garden. Its cascading growth adds texture and charm to various settings, from garden beds to hanging baskets.

However, to keep this plant thriving, you need to understand the basics of asparagus fern care. In this guide, we will explore everything you need to know about planting, growing, and maintaining asparagus fern. 

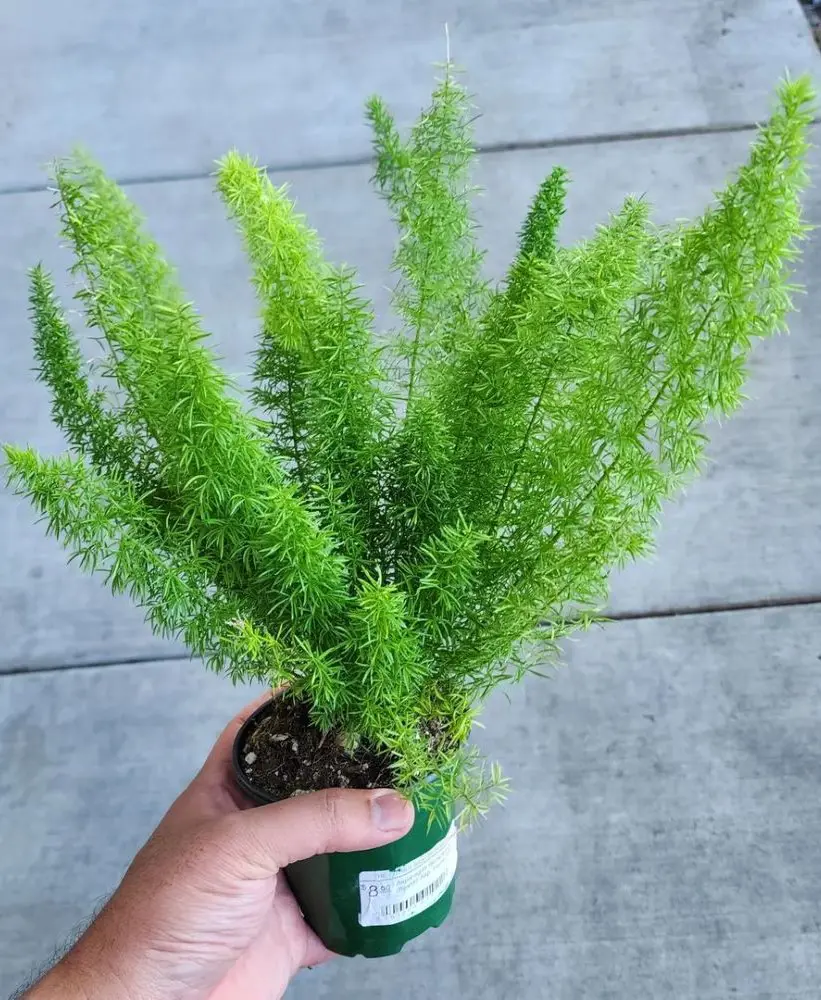
When and Where to Plant Asparagus Fern?

Planting and growing asparagus ferns starts by knowing when and where to plant asparagus fern. 

Light

Asparagus fern thrives in bright, indirect light. While it can tolerate lower light conditions, its growth may slow down, and its foliage might become sparse. Ideally, place your asparagus fern near a window where it can receive filtered sunlight.

Avoid direct sunlight, as it can scorch the leaves if growing indoors. Meanwhile, a spot with dappled sunlight or partial shade is perfect for outdoor settings. Providing the right light conditions helps maintain the plant's vibrant green color and encourages lush growth.

Soil 

Soil for asparagus fern should be well-draining. The soil should retain some moisture without becoming soggy. For that, mixing potting soil and sand or perlite is ideal, as it ensures good drainage and aeration. If you are planting in the ground, amend the soil with organic matter to improve its structure and drainage.

The pH level should be slightly acidic to neutral, ranging from 6.0 to 7.0. This soil composition helps prevent root rot and helps maintain its lush, fern-like appearance.

Water

Asparagus fern can tolerate periods of dryness, although it prefers consistently moist soil. Therefore, the plant should watered regularly to keep the soil evenly moist. However, avoid waterlogging, as this can lead to root rot.

A good rule of thumb is to water once a week, but you can adjust based on the plant’s environment and season. If you are still unsure, always check the top inch of the soil; if it feels dry, it is time to water. Ensure the pot or garden bed has good drainage to prevent excess moisture.

Temperature and Humidity

Proper temperature and humidity are key to a lush, healthy asparagus fern. These plants thrive best in moderate to warm temperatures, ideally between 60-75°F (15-24°C). It can tolerate occasional dips below this range but should be protected from frost, which can damage its delicate foliage.

For humidity, they prefer a relatively high level, ideally between 40-60%. If grown indoors, maintain higher humidity with a humidifier or by placing the plant on a humidity tray. If grown outdoors, especially in dry climates, regular watering is essential to keep the soil moist. 

How to Grow Asparagus Fern: Step-by-Step-Instructions

Source : instagram

Step 1: Choose the Right Location

The location you choose should have the ideal light conditions and temperature. Asparagus fern thrives in environments with bright, indirect light. If you are growing the plant outdoors, ensure the plant is protected from the harsh afternoon rays and receives partial shade.

If you are growing your plant indoors, place it near an East or north-facing window, as they provide gentle, consistent light. Also, ensure there is enough space around the plant for its fronds to cascade and grow. Avoid cramped areas that can inhibit the plant’s growth and health.

Step 2: Prepare the Soil

As mentioned before, asparagus fern prefers well-draining and aerated soil. For indoor plants, use a high-quality, pre-mixed potting soil designed for indoor plants. These mixes often contain a blend of peat moss, vermiculite, and perlite, which ensures good drainage and aeration.

For outdoor plants, choose loamy or sandy soil, as heavy clay soils can retain too much moisture, which is detrimental to asparagus fern. If you are mixing your soil, incorporate organic matter such as compost or well-rotted manure to enhance drainage. 

Step 3: Plant the Fern

When planting asparagus fern indoors or outdoors, it is important to get the depth right.

Indoor Planting

Choose a pot with drainage holes to prevent water from accumulating at the bottom. Fill the pot with a well-draining soil mix. Remove the asparagus fern from its nursery pot, gently loosen any tightly bound roots, and place it in the new pot.

Ensure the top of the root ball is level with the soil surface. Fill around the plant with more soil, then water thoroughly to settle the soil around the roots.

Outdoor Planting

If planting directly into the garden, prepare the planting area by loosening the soil. Dig a hole twice as wide as the root ball of the asparagus fern.

Position the plant in the hole so that the top of the root ball is level with the surrounding soil. Backfill the hole with soil and gently tamp it down to remove air pockets. 

How to Care for Asparagus Fern?

Source : gardenweb

Pest and Disease Management

Like most plants, asparagus fern might be susceptible to pests and diseases, especially when neglected or incorrect practices are employed. To ensure the fern is pest and disease-free, vigilance and timely action are required. Here is how to handle common issues:

Pests

  • Spider Mites: Spider mites are a common bug that affects most plants. They are tiny, spider-like pests that live on the underside of the leaves. To prevent these mites, increase humidity around the plant and wash the leaves with a strong jet of water. In severe cases, use insecticidal soap.
  • Aphids: Aphids are small, sap-sucking insects that can cause distorted growth. Remove them by washing the plant with water or using insecticidal soap. A mixture of water and mild dish soap can also be effective.
  • Mealybugs: Mealybugs are pink, soft-bodied insects covered with a white, waxy, cottony material. They feed on the plant’s juices. Remove them by hand or use a cotton swab dipped in alcohol. Insecticidal soap can also help.
  • Scale Insects: Scale insects look like small, hard bumps on leaves and stems. They are often overlooked because they are immobile. Scrape them off with a soft brush or cloth, and apply insecticidal soap or neem oil to affected areas.

Diseases 

  • Root Rot: Root rot is caused by overwatering and poor drainage. Ensure the pot has drainage holes and avoid letting the soil stay soggy. Remove affected roots and repot the fern in fresh soil if necessary.
  • Leaf Spot: Leaf spots are dark, water-soaked lesions on leaves. You need to remove these leaves to improve air circulation and void overhead watering to prevent them.
  • Powdery Mildew: Powdery mildew is a white, powdery fungus on leaves. Improve air circulation and reduce humidity to prevent this disease. If plants are infected, treat them with a fungicide or a mixture of water and baking soda.

Fertilizing

Fern asparagus care also requires fertilizers as it helps support its growth and vitality. Use a balanced, water-soluble fertilizer with equal parts nitrogen, phosphorus, and potassium or a fertilizer formulated specifically for ferns. Fertilize every 4-6 weeks during the growing season and stop in the fall and winter when the growth slows down.

Ensure you follow the manufacturer's instructions for dilution to prevent over-fertilization. Apply the diluted fertilizer to the soil around the base of the fern and avoid the leaves, as this can cause leaf burn.

Pruning 

When to Prune

Pruning an asparagus fern is essential for maintaining its appearance and health. You should prune your asparagus fern if there are dead or yellowing fronds to keep the plant looking tidy. You can also prune after significant growth periods to manage size and shape.

Avoid pruning during the plant's dormant period, usually in late fall or winter or after you have repotted or transplanted the fern. Also, avoid pruning in harsh conditions, such as during a heatwave or freezing winter.

How to Prune

Use clean, sharp scissors or pruning shears to make precise cuts and reduce the disease risk. Begin by identifying fronds that are brown, yellow, or withered. Cut them off at the base, close to where they emerge from the stem, but avoid cutting into healthy plant parts.

Trim back overly long or leggy fronds to encourage a bushier growth habit and shape the plant by cutting back stems growing out of proportion to the rest of the plant. Also, remove the older or crowded fronds to improve air circulation and light penetration, and remember to disinfect your pruning tools before and after use.

End of Season Care of Asparagus Ferns

Source : backyardboss

End-of-season care is about taking care of plants before they enter dormancy for the winter. This means cleaning up, moving the plant indoors, or mulching. By doing this, the plants will survive the cold months and emerge healthy and strong for the next growing season.

Cleaning Up

For asparagus fern, cleaning up at the end of the season involves removing dead, dying, or damaged plant material and any debris accumulated around the plant. Start by removing yellow or brown fronds. Clear debris like fallen leaves, stems, or other plant debris that collects around the fern.

This debris can harbor pests and diseases, which might affect the fern in the next growing season. Discard the dead plant material and debris away from the plant area, as this can spread pathogens.

Insulating

Insulating an asparagus fern during the end of the season helps protect it from cold temperatures, especially if it is grown outdoors in cooler climates.

Spread a 2-3 inch layer of mulch (such as straw, wood chips, or leaves) around the base of the fern. This mulch insulates the roots and keeps them warmer during cold spells. In areas with frost, cover the fern with a light cloth, frost blanket, or burlap during cold nights. 

Moving Plant Indoors

If your asparagus fern is growing outdoors in a pot and you live in an area with cold winters, you can move it indoors before the first frost.

To transition it smoothly, place the fern in a cool, bright spot indoors where it gets indirect light, like near a window but out of direct sunlight. This helps it adjust to indoor conditions without shock. Before bringing it inside, check for any pests and treat them to prevent infestations.

Watering Adjustment

Asparagus fern’s growth slows significantly during the dormant period in late fall and winter. This means it does not need as much water.

To manage this, allow the top inch or so of soil to dry out between waterings, but ensure the soil never becomes completely dry. Overwatering during dormancy can weaken the roots, making it harder for the plant to bounce back in spring. 

Propagating Asparagus Fern

Propagating asparagus fern is an easy way to grow this plant. It can be done through division or seeds.

Divisions

The division method is a reliable way to propagate an asparagus fern. To do this, carefully remove the plant from its pot and gently divide the root ball into smaller sections. Each section should have healthy roots and several fronds to ensure successful growth.

You can separate the root ball with your hands or a clean knife. Once divided, plant each section in a separate pot filled with fresh, well-draining soil. After repotting, water them thoroughly and place them in a bright spot with indirect light. 

Seed

Propagating asparagus fern from seeds involves collecting ripe berries containing the seeds and then sowing them. First, gather ripe berries and extract the seeds by removing the pulp and rinsing them clean. Next, sow the seeds in a shallow tray filled with seed-starting mix, lightly covering them with a thin layer of soil.

Keep the tray in a warm, bright location to promote germination. Maintain soil moisture by misting regularly and covering the tray with plastic wrap. Germination takes several weeks, after which you can transplant the seedlings into individual pots. 

Repotting Asparagus Fern

Repotting asparagus fern is essential for maintaining its health and promoting growth. As the plant matures, it can become roots-bound, expand in size, and lose soil nutrients. This can affect the plant’s health, and if neglected, it will not survive. Here is how to repot an asparagus fern. 

Source : instagram

How to Repot

  • To repot asparagus fern, start by selecting a new pot that is 1-2 inches larger in diameter than the current one, with drainage holes to prevent waterlogging. 
  • Gently remove the fern from its existing pot, loosening the root ball if it is root-bound. 
  • Inspect the roots, trimming any damaged or excessively long ones with clean scissors to encourage new growth.
  • Place a layer of fresh, well-draining potting mix in the bottom of the new pot, then position the fern in the center and fill around it with more potting mix, gently pressing it down. 
  • Water the plant thoroughly to settle the soil and ensure proper hydration.
  • Avoid fertilizing immediately, and place the fern in its usual light and temperature conditions to help it adjust to its new pot.

Common Issues With Asparagus Fern

Care of asparagus fern means you have to deal with common issues that plague your plant while it is maturing. These are some common issues and how you can deal with them. 

Yellow Leaves

Asparagus fern turning yellow can be a sign of various issues. Firstly, it is a sign of over or under-watering, which can lead to root rot. Secondly, if the plant is in too much direct sunlight or too little light, it can cause yellowing. Lastly, yellow leaves might result from a lack of essential nutrients, such as nitrogen. 

How To Fix 

Allow the top inch of soil to dry out between waterings, and check the soil moisture regularly. Keep the soil consistently moist and well-draining, especially during the growing season.

To improve light conditions, move the fern to a spot with bright, indirect light. As for nutrients, apply a balanced, water-soluble fertilizer according to the package instructions.

Leggy Growth

Leggy growth in asparagus fern occurs when the plant stretches out with long, weak stems with sparse foliage. This growth can be caused by inadequate light, improper watering, and a lack of regular pruning.

Without regular pruning, older fronds can become sparse and elongated as the plant continues to grow new foliage without managing older, less productive parts. This results in long, thin stems with fewer leaves, giving the plant a stretched-out, leggy appearance.

How to Fix

To prevent leggy growth, optimize watering and improve light conditions. Also, cut back the long, leggy stems to encourage new, dense growth using clean, sharp scissors or pruning shears.

Remove the overextended fronds at their base to promote a fuller appearance and stimulate new shoots.