Peace lilies (Spathiphyllum) are popular houseplants known for their lush green leaves and elegant white flowers. They are relatively low-maintenance and can thrive in various indoor conditions.
However, like all plants, peace lilies benefit from occasional repotting to ensure optimal growth and health. Repotting a Peace lily involves transferring it to a larger pot or refreshing its soil to provide better nutrient availability and more space for root growth.
This comprehensive guide will explore the step-by-step process of repotting a peace lily, along with tips and best practices for ensuring your plant thrives.
Why Repotting is Important
Repotting is a crucial aspect of plant care for several reasons:
- Nutrient Depletion: Over time, the nutrients in the potting soil get depleted, and the plant may not receive the essential nutrients it needs for healthy growth.
- Root Bound: As peace lilies grow, their roots can become pot-bound, meaning they outgrow their current container. This can restrict root growth and affect the plant's overall health.
- Soil Aeration: Fresh soil provides better aeration, which is essential for root respiration and nutrient uptake.
- Pest and Disease Management: Repotting allows you to inspect the roots and soil for any signs of pests or diseases, and take necessary action to address these issues.
When to Repot a Peace Lily
Knowing when to repot your peace lily is key to maintaining its health. Here are some signs that indicate your peace lily needs repotting:
- Roots Growing Out: If you notice roots growing out of the drainage holes or circling the surface of the soil, it's time to repot.
- Wilting: If the plant wilts frequently even after watering, it could be a sign that the roots are overcrowded.
- Slow Growth: If your peace lily's growth has slowed down or it appears stunted, repotting may help by providing more space and fresh nutrients.
- Soil Degradation: If the soil has compacted or degraded, it may no longer provide adequate aeration or drainage for the roots.
Ideally, repot your peace lily every 1-2 years to ensure it remains healthy and vibrant.
Choosing the Right Pot and Soil
Selecting a Pot
When choosing a new pot for your peace lily, consider the following factors:
- Size: Select a pot that is 1-2 inches larger in diameter than the current pot. This gives the roots enough room to grow without overwhelming the plant with too much soil, which can lead to water retention and root rot.
- Material: Pots can be made of various materials, including plastic, ceramic, and terracotta. Plastic pots are lightweight and retain moisture well, while terracotta pots are porous and allow for better aeration. Choose a material that suits your watering habits and the plant's needs.
- Drainage: Ensure the pot has drainage holes to prevent water from accumulating at the bottom, which can cause root rot.
Choosing the Right Soil
Peace lilies thrive in a well-draining potting mix that retains some moisture without becoming waterlogged. A suitable potting mix for peace lilies typically includes:
- Peat Moss: Retains moisture while providing good aeration.
- Perlite or Vermiculite: Improves drainage and prevents soil compaction.
- Compost or Organic Matter: Adds nutrients to the soil and enhances its structure.
You can use a commercial potting mix designed for houseplants or create your own mix using equal parts peat moss, perlite, and compost.
Step-by-Step Guide to Repotting a Peace Lily
1. Prepare the New Pot and Soil
Start by preparing the new pot and soil mix:
- Clean the Pot: If you're reusing an old pot, clean it thoroughly with soap and water to remove any residue or pathogens.
- Add Drainage Layer: Place a layer of small stones or broken pottery at the bottom of the pot to improve drainage.
- Fill with Soil: Add a few inches of the prepared potting mix to the bottom of the pot.
2. Remove the Peace Lily from Its Current Pot
Carefully remove the peace lily from its current pot:
- Water the Plant: Water the peace lily a day before repotting to make the soil easier to work with.
- Loosen the Soil: Gently loosen the soil around the edges of the pot with a trowel or your fingers.
- Remove the Plant: Hold the base of the plant and gently slide it out of the pot. If the plant is stuck, tap the sides of the pot or squeeze it gently to release the roots.
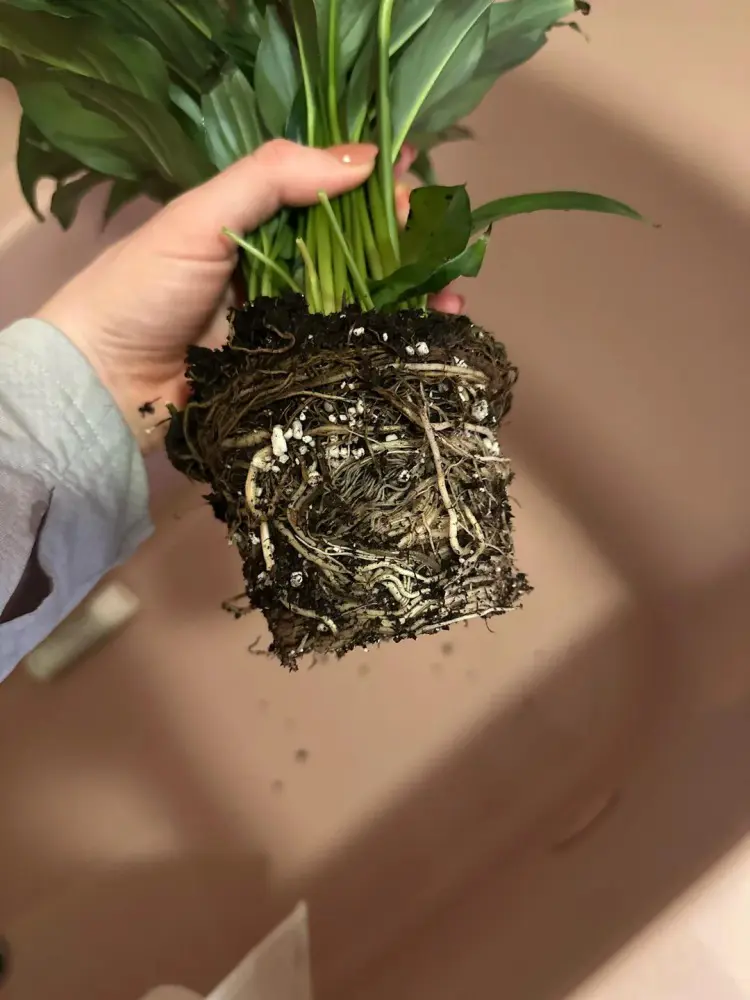
3. Inspect and Trim the Roots
Once the plant is out of the pot, inspect the roots:
- Check for Health: Look for healthy, white roots. If you find any dark, mushy, or rotten roots, trim them off with clean, sharp scissors or pruning shears.
- Untangle the Roots: If the roots are densely packed or circling the root ball, gently untangle them to encourage outward growth.
4. Place the Plant in the New Pot
Position the peace lily in the new pot:
- Center the Plant: Place the plant in the center of the pot, ensuring it sits at the same depth as it did in the old pot. The crown of the plant (where the stems meet the roots) should be just above the soil level.
- Add Soil: Fill in around the root ball with the potting mix, pressing it gently to eliminate air pockets. Be careful not to bury the crown of the plant.
5. Water and Settle the Soil
After positioning the plant, water it thoroughly:
- Water Evenly: Water the soil evenly until it is moist but not waterlogged. This helps to settle the soil around the roots and ensures good contact between the roots and the soil.
- Top Off the Soil: If the soil settles significantly after watering, add more potting mix to maintain the proper soil level.
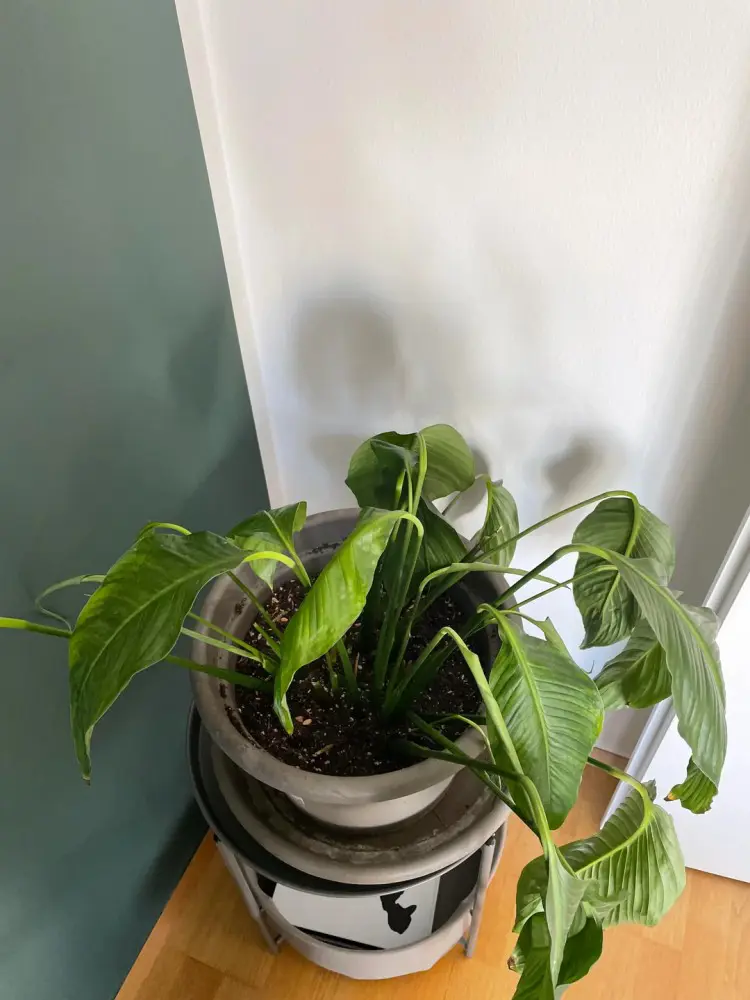
6. Care for Your Repotted Peace Lily
Once repotted, place the peace lily in a suitable location and resume regular care:
- Light: Peace lilies prefer bright, indirect light. Avoid direct sunlight, which can scorch the leaves.
- Watering: Keep the soil consistently moist but not soggy. Water when the top inch of soil feels dry to the touch.
- Humidity: Peace lilies thrive in high humidity. Mist the leaves regularly or place a humidity tray nearby.
- Fertilizing: Feed the plant with a balanced, water-soluble fertilizer every 6-8 weeks during the growing season (spring and summer).

Avoiding Common Repotting Issues
Root Rot
Symptoms: Wilting, yellowing leaves, mushy roots.
Solution: Remove affected roots, improve drainage, and reduce watering frequency.
Transplant Shock
Symptoms: Wilting, drooping leaves, slowed growth.
Solution: Provide proper care, avoid overwatering, and ensure adequate light and humidity.
Leaf Yellowing
Symptoms: Yellow leaves, particularly older ones.
Solution: Check for overwatering or underwatering, adjust the watering schedule, and ensure proper drainage.
FAQs
1: How often should I repot my peace lily?
Answer: Ideally, peace lilies should be repotted every 1-2 years. However, the exact timing depends on the plant’s growth rate and the condition of its roots. If you notice signs such as roots growing out of the drainage holes, soil degradation, or slow growth, it's a good indication that your peace lily needs repotting.
2: What type of soil is best for peace lilies?
Answer: Peace lilies thrive in well-draining potting mixes that retain some moisture without becoming waterlogged. A good potting mix includes equal parts of peat moss, perlite or vermiculite, and compost or organic matter. This combination ensures adequate moisture retention, aeration, and nutrient availability.
3: Can I repot my peace lily during any season?
Answer: The best time to repot a peace lily is during the spring or early summer when the plant is actively growing. Repotting during the growing season allows the plant to recover quickly and establish itself in the new soil. Avoid repotting during the winter months when the plant is in its dormant phase, as this can stress the plant.
4: What size pot should I use when repotting my peace lily?
Answer: When selecting a new pot for your peace lily, choose one that is 1-2 inches larger in diameter than the current pot. This size increase provides enough room for root growth without overwhelming the plant with too much soil, which can lead to water retention and potential root rot. Ensure the new pot has drainage holes to prevent waterlogging.
5: How should I water my peace lily after repotting?
Answer: After repotting, water your peace lily thoroughly to help settle the soil around the roots. Ensure the soil is evenly moist but not waterlogged. Going forward, maintain consistent moisture by watering when the top inch of soil feels dry to the touch. Be mindful not to overwater, as peace lilies are susceptible to root rot.
6: What should I do if my peace lily shows signs of transplant shock?
Answer: Transplant shock can occur after repotting, causing symptoms like wilting or drooping leaves. To help your peace lily recover:
- Provide proper care: Ensure the plant receives bright, indirect light and consistent moisture.
- Avoid overwatering: Let the soil dry slightly between waterings to prevent root rot.
- Increase humidity: Mist the leaves regularly or use a humidity tray to create a more humid environment.
- Be patient: Give the plant time to adjust to its new pot and soil. With proper care, it should recover and resume healthy growth.
In conclusion, repotting a peace lily is a straightforward process that can significantly enhance the plant's growth and health. By choosing the right pot and soil, following the proper repotting steps, and providing consistent care, you can ensure your peace lily thrives and remains a beautiful addition to your indoor garden.
Regular repotting not only helps in maintaining the plant's vigor but also allows you to monitor its health and address any issues promptly. With the tips and guidelines provided in this article, you'll be well-equipped to repot your peace lily and enjoy its lush, vibrant foliage for years to come.