How To Grow

How To Plant, Grow And Care For Bottlebrush

Source : waterwisegardenplanner

Bottlebrush plants (Callistemon) are striking evergreen shrubs or small trees known for their cylindrical, brush-like flowers in shades of red, pink, or yellow. This article shows the ways to successfully cultivate these Australian natives in your own garden.

From selecting the right variety and planting location to providing proper care through watering, pruning, and pest control, you'll learn the essential steps to ensure your plant bottlebrush thrives and puts on a vibrant floral display year after year.

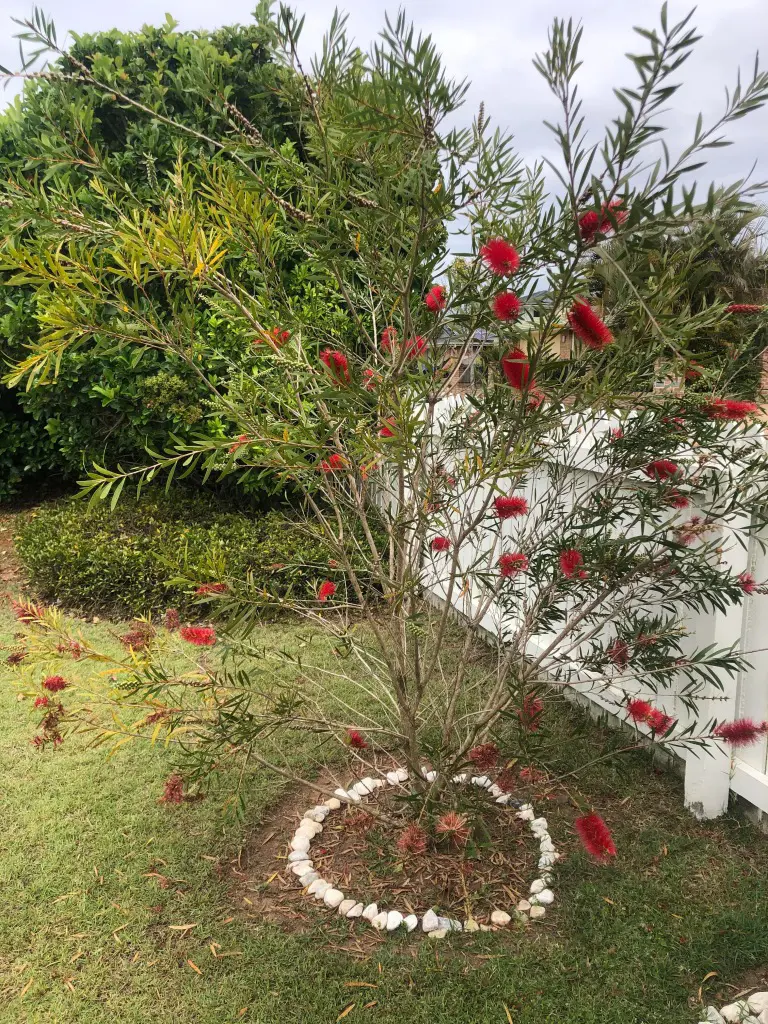
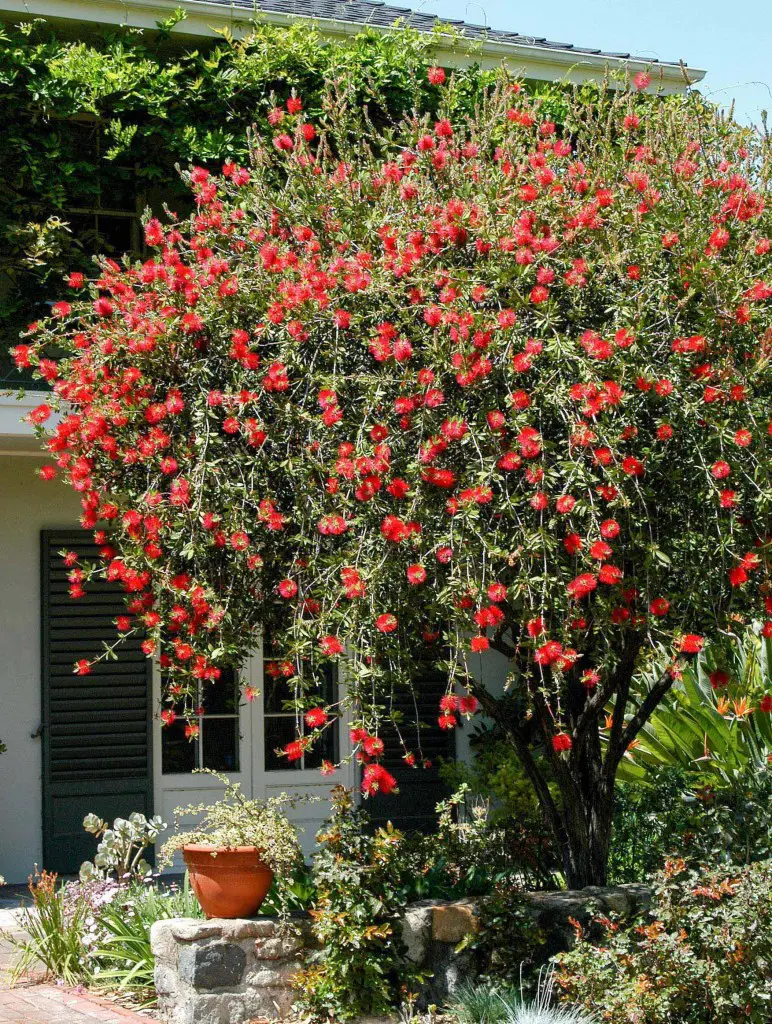
Planting Bottlebrush Tree

Source : pexels

If you're looking to plant a bottlebrush tree in your backyard, the following steps are a good place to start:

Site Selection:

  • Choose an area receiving 6-8 hours of direct sun exposure daily for best flowering and performance.

Planting Hole Preparation:

  • Dig a planting hole 2-3 times wider than the rootball, but no deeper than the rootmass height.
  • Amend backfill soil generously with aged compost, manure, leaf mold or other organic matter to improve drainage and nutrients.
  • The ideal soil pH range is 5.5-6.5 on the slightly acidic side.

Spacing:

  • For multiple bottlebrush plants, space them based on their expected mature size.
  • Allow 4-6 feet between plants for proper air circulation.

Planting Depth:

  • Set plants at the same soil depth they were growing in the nursery container.
  • Water thoroughly after planting to settle the soil around the roots.

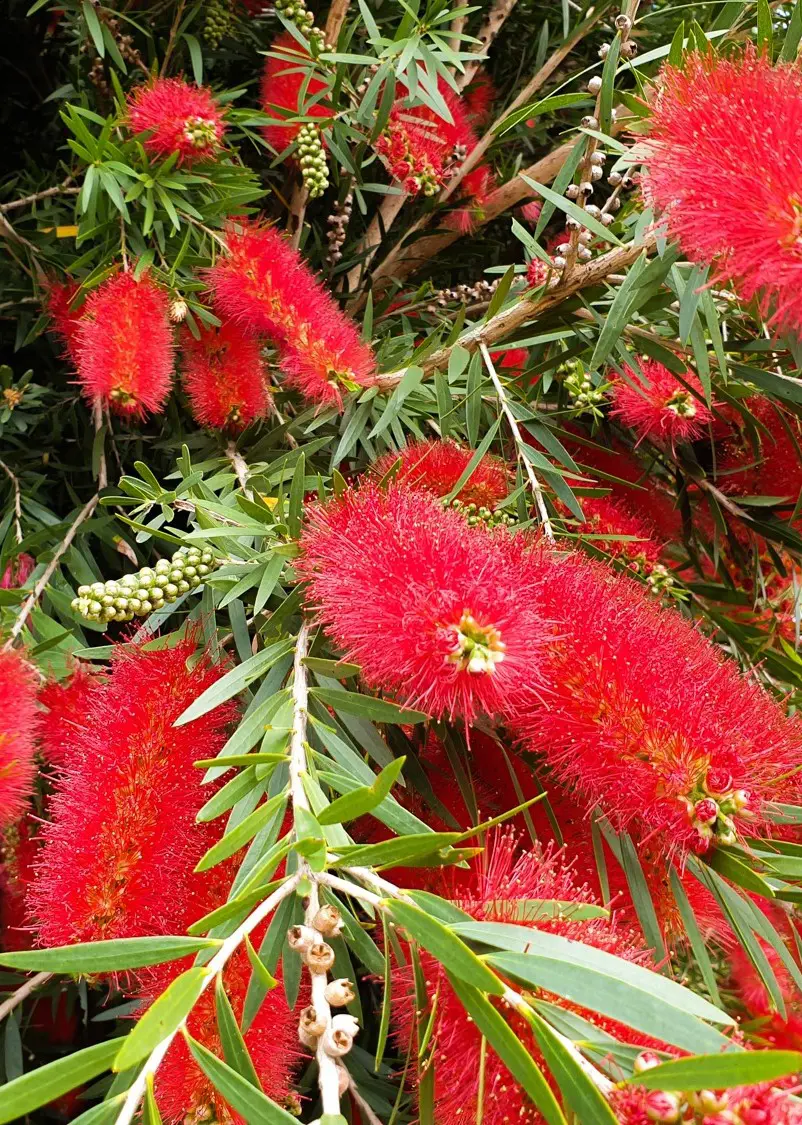
By following these planting guidelines, you'll give your bottlebrush shrubs the optimal start for establishing a strong root system and putting on a brilliant floral display. The full sun exposure, well-draining soil amended with organics, and proper spacing all contribute to their long-term health.

How To Grow Bottlebrush From Seed

Source : reddit

Bottlebrush trees and shrubs (Callistemon species) make striking additions to the landscape with their showy, brush-like flower spikes. While nursery-grown plants are readily available, you can also propagate bottlebrushes at home from seeds.

This is a cost-effective way to produce an abundance of new plants, though the resulting seedlings may exhibit variations from the parent plant. With some patience, it's very rewarding to grow bottlebrushes from seed.

1. Seed Collection

  • Allow seed capsules to mature on the plant for at least 2 years before collecting
  • Harvest older capsules from lower on the branches, not new capsules from tips
  • Place the collected capsules in a paper bag and store in a warm, dry location
  • The capsules should split open over the next few days, releasing the tiny seeds

2. Seed Sowing

  • Fill seed trays or containers with a sterile, peat-based seed starting mix and moisten it
  • Sprinkle the seeds evenly over the surface of the planting mix
  • Lightly mist the seeds with a spray bottle to settle them into the mix without burying

3. Germination Conditions

  • Cover the seed containers with clear plastic wrap or a dome lid to increase humidity
  • Place them in a warm spot around 70-80°F such as on a greenhouse bench or sunny windowsill
  • Keep the seed starting mix consistently moist by misting regularly when the surface dries

4. Seedling Care

  • Once the seedlings emerge in 2-3 weeks, remove the plastic covering
  • Provide very bright light once seedlings appear for best growth
  • Allow the seed starting mix to dry out slightly between mistings, but don't let it fully dry out

5. Potting Up

  • When bottlebrush seedlings reach 3-4 inches tall, transplant them into larger containers
  • Use a well-draining potting mix amended with some sand or grit
  • Space multiple seedlings equidistant in the same container if desired

6. Hardening Off

  • Plan to keep containerized seedlings growing for their first season
  • After all danger of frost has passed, begin acclimatizing them to outdoor conditions
  • Set plants outdoors for gradually increasing periods over 1-2 weeks before transplanting

7. Transplanting

  • Choose a sunny location with well-drained soil to transplant bottlebrushes into the ground
  • Amend planting areas with compost or manure to provide nutrients
  • Space plants following the recommended mature spread for the variety
  • Water regularly during establishment until new growth appears

While bottlebrush seeds may not produce plants identical to the parent, growing from seed allows you to affordably produce many new plants to pick superior specimens. With proper care and patience, the seedlings should reach blooming size in 2-3 years.

Bottlebrush Plant Care

Source : reddit

When growing bottlebrush bush, place the plants in a full sun location, though partial or full shade is also acceptable. Plant them in moist, well-draining acidic soil. Water deeply and consistently to keep the soil moist but not overly soggy.

Maintain good air circulation by proper spacing. Apply mulch to help retain soil moisture. Prune in early spring if needed for shaping and promoting bushiness. Protect from harsh winds that could damage the branches.

Light Requirements:

  • Bottlebrush hedge are true sun-lovers that require very bright, direct light conditions
  • At minimum, they need 6 hours of unobstructed sunlight but prefer 8 hours or more
  • If planted in too much shade or overcrowded with taller trees/shrubs that block the sun, flowering will be sparse or non-existent
  • Prune back overhanging branches from nearby plants to maximize sun exposure if needed

Soil Preferences:

  • Fast-draining, well-aerated soil is a critical requirement to prevent issues like root rot
  • Sandy or sandy loam soils with lots of organic matter are ideal bottlebrush soil types
  • In dense clay soils, amend generously with compost, pine bark, perlite or coarse sand to loosen the texture
  • Bottlebrushes struggle in highly alkaline soils above 7.0 pH, often developing iron chlorosis

Watering:

  • Newly planted bottlebrushes need consistent moisture as they work on becoming established
  • Water deeply 2-3 times per week during the first growing season, applying 1-2 inches of water each time
  • Once established, bottlebrushes have high drought tolerance and only need supplemental irrigation during dry spells
  • When rainfall is lacking, provide a deep soaking every 7-10 days during the hotter months
  • Allow the top few inches of soil to dry out somewhat between waterings, avoiding constantly soggy conditions

Temperature & Humidity:

  • Native to Australia, bottlebrushes love warm to hot temperatures between 70-100°F
  • Most cultivated varieties are cold hardy from zones 8b-11, with frosts below 20°F potentially damaging
  • Evergreen types may lose much of their foliage over winter in sustained freezing temps
  • High humidity levels are not an issue as long as the soil is fast-draining and plants have good air flow
  • Low humidity and arid conditions can be tolerated if the plants receive consistent irrigation

Fertilizing:

  • Feed bottlebrushes in early spring just before they begin putting out their new flush of growth
  • Use an acidic fertilizer formulation made for azaleas, camellias, rhododendrons and other acid-lovers
  • Alternatively, use a balanced fertilizer with soil acidifier like sulfur or iron additions
  • Provide a second application in late spring or early summer to support vigor and blooming
  • Avoid high nitrogen fertilizers which promote excessive leafy growth over bloom production
  • Treat iron chlorosis with chelated iron supplements or fertilizers containing iron

Pruning:

  • Prune lightly just after the bloom period to shape plants and remove spent flower spikes
  • More severe renewal pruning can be done in late winter before spring budbreak if needed
  • Established bottlebrushes can be pruned into single or multi-trunk tree forms through selective pruning
  • Remove any dead, damaged or rubbing branches whenever they occur

Propagating Bottlebrush from Cuttings

1. Take Cuttings

  • Use clean, sharp pruners or knife to take 5-6 inch stem cuttings from healthy bottlebrush plants
  • Select semi-mature stem sections that have begun to harden off but aren't fully woody
  • Avoid taking cuttings from very new, tender green growth at the tips
  • Remove any flower buds that are present by pinching them off
  • Strip off the leaves on the bottom 2/3 of each cutting, leaving just a few sets of leaves at the top

2. Prepare Cuttings

  • Use a clean, sharp razor or pruners to make a fresh angled cut on the bottom of each cutting
  • Dip the cut ends into a powdered rooting hormone containing IBA or NAA to encourage root development
  • Fill 6-inch plastic pots or trays with a sterile, well-draining rooting medium like a 50/50 mix of perlite and peat moss
  • Make holes and carefully insert the prepared cuttings, gently firming the medium around the base

3. Rooting Environment

  • Water the newly stuck cuttings with a gentle stream to thoroughly settle the rooting mix
  • Cover each pot with a clear plastic bag or domed lid to create a humid mini-greenhouse
  • Secure the plastic loosely, ensuring it doesn't directly contact the cutting stems/leaves
  • Place the covered cuttings in a warm spot around 70-75°F with bright, indirect light exposure

4. Monitoring & Care

  • Open or remove the plastic coverings periodically for a few minutes to allow gas exchange
  • Check the rooting mix moisture weekly and water with a gentle stream if the surface becomes dry
  • After 4-6 weeks, give the cuttings a very gentle tug to check for resistance from new root development
  • Rooted cuttings will also begin pushing out new topgrowth

5. Potting Up

  • Once the cuttings have developed a robust root system, carefully transplant them up into larger 6-8 inch containers
  • Use a lightweight, well-draining potting mix like equal parts potting soil, perlite and compost
  • Place the potted up cuttings in a sun-dappled or high light location, slowly introducing more sun
  • Allow the new plants to establish in their containers over the first season

6. Hardening Off & Transplant

  • In spring after the last frost date, begin hardening off the cutting-grown bottlebrushes
  • Set them outdoors in a shaded location for a few hours daily, gradually increasing the sun exposure time
  • After 2-3 weeks of hardening off, the plants can be transplanted into their permanent landscape locations
  • Choose a site with full sun exposure and well-draining soil amended with compost
  • Space following the expected mature spread, providing regular irrigation until established

Propagating bottlebrushes from stem cuttings allows you to clone plants with desirable traits from the parent plant. With the proper rooting conditions and care, the cuttings can rapidly develop a robust root system within just a few months. 

Pests & Plant Diseases

Source : reddit

Bottlebrush shrub are generally resilient and low-maintenance, but they can still be susceptible to certain pests and diseases if conditions are favorable. Being aware of potential issues and taking proactive measures is important for maintaining the plant's health and beauty.

Common Pests:

Scale Insects

  • Appear as brown, armor-like shells on foliage
  • For minor infestations, prune and dispose of affected foliage
  • Treat severe outbreaks with horticultural oil or insecticides

Plant Diseases:

Root/Crown Rots

  • Caused by fungi in overly moist soil conditions
  • Symptoms include general plant decline

Twig Gall

  • Bloated, swollen growth on new branches
  • Often due to excess moisture
  • Prune off affected areas

Prevention and Treatment:

  • Ensure good air circulation around the bottlebrush
  • Allow soil to dry out somewhat between waterings
  • Prune out any dead, diseased or infested growth promptly
  • As a last resort, apply an appropriate fungicide or insecticide per instructions

Maintaining proper cultural conditions of well-draining soil and avoiding overwatering is key to preventing most bottlebrush problems. Quickly removing any affected plant parts also helps contain pests and diseases before they can spread.

With some simple preventative care, these drought-tolerant shrubs can thrive with very few issues.

Bottlebrush Plant Varieties

Source : instagram

Bottlebrush plants offer an incredible array of sizes, forms, and vibrant flower colors. While there are numerous species, some are more readily available than others in the U.S.

When selecting bottlebrush varieties, it's important to consider mature size, cold hardiness for your region, and desired traits like flower color or fragrant foliage. Here's a more in-depth look at some popular options:

Melaleuca citrina Varieties

  • Scarlet Compacta - A large shrub/small tree reaching 12ft tall by 10ft wide at maturity. Bears spectacular long, bottle-brush flowers in brilliant scarlet red. However, it is only hardy in the warm winters of zones 10-11.
  • Little John - A dwarf form of the crimson bottlebrush (M. citrina), growing just 3ft tall and wide. Features bluish-green foliage and shorter red flower spikes. Cold hardy to zone 8a.
  • The species itself is known as the crimson or lemon bottlebrush for its fiery red blooms and lemon-scented foliage when crushed.

Melaleuca viminalis Cultivars

  • Neon Pink - An upright grower to 8-12ft tall and slightly less wide. Stunning bright neon pink bottlebrush flowers adorn the plant in spring, contrasting beautifully with the gray-green foliage. Hardy to zone 8.
  • Slim - With a slimmer, almost weeping multi-stemmed form, this variety grows 10ft tall but only 4ft wide, making it perfect for tighter spaces. Pink-red brushes. Also zone 8 hardy.

Other Standout Selections

  • Light Show (Southern Living) - A compact 5ft x 4ft upright variety with spiky chartreuse foliage emerging in spring before darkening to green. Short red bottlebrushes. Cold hardy to zone 8b.
  • Semmes Hardy & Woodlanders Hardy - Two similar cold-hardy (zone 7b) selections with an arching 5ft x 5ft form. New foliage emerges copper-toned before maturing to green, with vivid red bottlebrush flowers. Foliage is citrus-scented.

While this covers some of the more readily available bottlebrush varieties, local nurseries may carry even more unique selections or species. These plants offer stunning flower displays, gorgeous foliage colors and texture, and various forms to fit any landscape.