How To Grow

How To Plant, Grow And Care Millet

Source : instagram

Millet is one nutritious and versatile alternative to most of the grains that you will find super easy to grow. Looks like this ancient grain is making a comeback and for good reason.

Millet is hardy and quite drought-resistant so doesn't matter whether you are a seasoned gardener or just a curious beginner growing millet will be one rewarding experience. But are you dealing with where you start or how to ensure a bountiful harvest? Don't worry for we have got you covered.

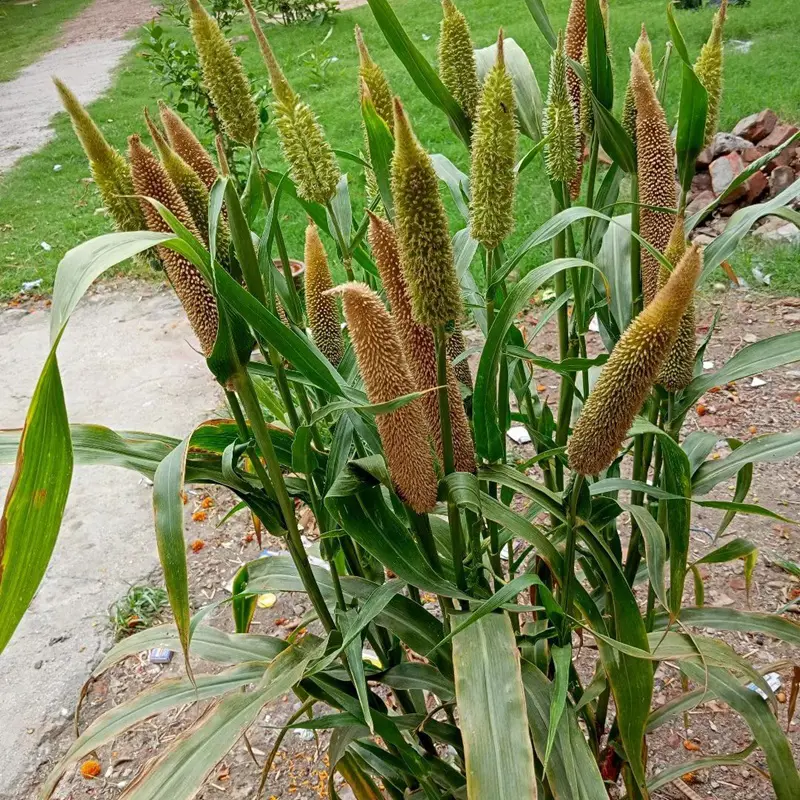
When and Where to Plant Millet

Before planting millet in your garden, you might want to consider the optimal conditions for a successful harvest. We have listed out some conditions you need to consider to grow millet; Here's what you need to know.

Location and Light

Millet grows best in full sunlight which makes it essential for you to select a location that offers millet with a basking zone. Six to Eight hours of sunlight each day would be good for this sun-loving crop. 

Just understand that it is completely dependent on light to grow well and produce seeds. It's more of a like "the more, the better". So ensure shaded areas are avoided where you are about to plant millet.

Soil

Millet tends to grow well in well-draining soil with a pH between 5.5 and 7.0. Make sure the soil is also either loamy or sandy soil. At the same time, make sure these soils have moderate fertility and hold moisture well without getting waterlogged.

You are free to add organic matter, like compost or well-rotted manure. This is done because they can improve the soil's structure and fertility. This will give the millet plants all the nutrients they need. Proper soil preparation helps ensure a healthy millet crop for the growing season.

Spacing

Source : instagram

Proper spacing allows for good aeration and less competition for nutrient and water uptake in millet. Sow millet seeds 2 to 3 inches apart in small-scale gardens, with the rows 12-18 inches apart. However, under field or farm-scale conditions, one can plant using a seed drill, sowing the rows 24 to 36 inches apart.

After seedlings grow to 4-6 inches tall, thin them out to stand 6-8 inches apart. This spacing allows each plant enough room for proper growth and offers it the available share of resources it needs for healthy growth, reducing the chances of catching diseases.

Planting Time

You need to be aware of the planting time for your millet plant. In warm areas,  plantation of millet is usually done in late spring to early summer when the temperature reaches about 65°F. In cooler areas, it is best to sow after the threat of frost has passed and the soil has warmed up a bit.

If you want your millet harvest to be in the fall, plant it 60 to 70 days before the first frost, so it matures just in time. With these timing estimates in mind, let's get into the step-by-step process of growing this multi-purpose grain.

How To Grow Millet Plant: Step-by-Step-Instructions

Growing millets from seeds is the most common and only method due to the success rate. It's only because it is super simple. We've listed out the correct steps to grow millets from seeds so your planting experience becomes one huge success!

Step 1: Obtain Fresh Seeds

First and foremost, when you are about to grow millets, you need to have fresh seeds since the germination rate of seeds drops fast if the soil is not healthy. Acquire seeds from a qualified nursery or gardening shop where quality can be guaranteed.

When purchasing seeds, you need to make sure they are free from mold and pests This is an indication that the seed is healthy. We strongly advise you to go for Fresh Seeds!

Step 2: Prepare the Soil

In the preparation of the soil for the sowing of millet, soil should be first loosened to a depth of 6-8 inches. Loosening will facilitate a soft, well-aerated medium through which the roots pass easily and absorb nutrition.

Also, remove all weeds and rubbish from the site since this will provide competition to the millet plants for both nutrients and water. In case of a lack of fertility or structure in the soil, add some organic matter like compost or well-rotted manure. This can significantly improve the quality of the soil.

Step 3: Sow the Seeds

Source : facebook

Planting millet seeds involves first making shallow furrows in the soil, about ½ inch deep. Space these rows about 12-18 inches apart to allow proper growth of the plants concerning sunlight and air.

Then, sow the seeds thinly along the furrows, spaced about an inch apart. This distance would prevent overcrowding and give each seedling enough room to grow. Careful sowing of the seeds in this direction will clear the way for a good millet crop to grow and yield a good harvest.

Step 4: Cover and Water

After sowing the seeds, then they need to be covered with a little soil to encourage germination and protect them from harmful external agents. This area is to be softly watered in an attempt not to transport the sown seeds elsewhere.

The soil is to be maintained moist to satisfy the required quantities of moisture needed for seed sprouting. The moisture content is to be moderately and adequately observed, as the results will be seen in spongy conditions which will affect the seedlings' growth.

Step 5: Thinning

Thin out when the millet seedlings grow to 2-3 inches tall. This involves removing some of the seedlings to ensure that the remaining plants are spaced 6-8 inches apart. Since they are all bunched in a small piece of land, thinning is necessary to ensure adequate spacing and not become overcrowded.

Proper spacing provides for sufficient aeration for the crops so that not too much moisture is retained between plants, thus reducing the occurrence of diseases and sufficient supply of nutrients and sunlight to each plant.

Step 6:Provide Support

For the taller varieties of millet, it will be necessary for one to stake it to avoid lodging. The stakes or trellises should be placed close to the plants in such a way that the support they provide keeps the plants in an upright position.

In this case, gently tie the stalks to the stakes or guide them along the trellises as they grow. This will not only help in maintaining the structure of the plant but also allow for better sunlight and aeration. Support, notably in the case of windy conditions.

Step 7: Maintain Moisture

Proper millet growth requires frequent watering of the plants, especially during the dry season. Approximately 1 inch of water per week would be enough to keep the soil moist at any given time.

This helps in the formation of turgid and healthy plants in their developing stages and seed formation. Although millet can survive drought after its establishment, proper watering in times of dryness enables the plants to grow strong and healthy so that they may yield more.

Step 8: Control Weeds

Source : freepik

Control weeds around millet plants by weeding manually, or applying mulch, which stops them from coming up in the first place. To do this, put a layer of mulch around the base of your plants to stop weed growth,

If weeding is done manually, care must be exercised to avoid injuring millet roots because the plants will be wounded, resulting in stunted growth.

How To Care for Millets

There are certain things you need to keep in mind after planting the millet plants. We have listed some ways and areas of care you should orient yourself to when caring for millet plants.

Growing Habit

Millet Plants (Panicum miliaceum) is a resilient and hardy annual crop. Millets have the potential to grow to a height of 2 to 4 feet. Plants of millet are tufted in growth habit—that is, growing in clumps, with several stems arising from the base. They tend to spread out in a fashion that sometimes forms dense, bushy clusters.

The plants should have good spacing to allow the plants to spread naturally and also to allow for air circulation. The millet plants are mostly self-pollinating, although they might have more yield when subjected to wind cross-pollination.

Watering

Although millets can be drought tolerant, proper millet growth requires frequent watering of the plants, especially during the dry season. Approximately 1 inch of water per week would be enough to keep the soil moist at any given time.

This helps in the formation of turgid and healthy plants in their developing stages and seed formation. Although millet can survive drought after its establishment, proper watering in times of dryness enables the plants to grow strong and healthy so that they may yield more.

Fertilization

Source : facebook

Millet is one of the low-maintenance crops when it comes to fertilization, so it is a cinch to grow for those of us who wish to adopt a backseat approach in that regard. A light touch is enough: a balanced fertilizer like 10-10-10 applied before planting, and your millet really should not go wrong.

Then, a boost at mid-season keeps things on track. Side-dress with high-N fertilizer if you're feeling extra generous when the plants are about 6 inches tall. Be careful not to overdo it. The temptation is to go overboard, but a balanced approach will suffice.

Mulching

One might think of mulching as doling out a blanket of advantages to millet plants. A 2 to 3-inch-deep layer of organic mulch, such as straw or grass clippings, helps in the retention of soil moisture much like providing your plants with a nice drink without overwatering.

This mulch will prevent weeds from coming plus it regulates soil temperature, ensuring that your millet’s roots stay comfortably even during weather’s mood swings. Just remember to keep the mulch a bit away from the plant stems to avoid any unwanted moisture issues.

Pests and Diseases

While millet plants are generally hardy, they are not entirely free of pests and diseases. Be on the lookout for aphids and beetles that find your millet too appetizing and fungal issues like downy mildew.

This would require regular check-ins to spot problems early on plus plants that are properly spaced, maybe with a little periodic pruning to thin them out, will help to keep the millet plants in top shape reduce the potential for disease, and set up a great harvest.

End Of Season Care

Previously we learned about how to care for millet plants, and this section is here to enlighten you about the areas that need to be considered as a end of season care for millet plants. If you care about it during the end season only then the next growing season will gift you with healthier plants. 

Towards the close of the growing season, it becomes crucial to start anticipating and addressing the next season and the existing problems that arise. Let's learn about end-season care for millets.

Pruning

Source : pexels

Millet needs pruning, an essential part of end-of-season care for these plants. Start by cleaning up any dead or diseased foliage to prevent further invasion by pathogens. Next, cut the stems back down to about 2 to 3 inches from the ground.

It prepares the plants for the subsequent growing season.  Remove all the remnants of plants so that they do not turn into a cozy, warm overwintering area for the undesirables. 

Protection

In regions with cold winters, millet doesn’t require special winter protection since it's an annual plant that completes its life cycle within a single growing season. However, preparing your beds for winter can make things considerably easier when spring finally rolls around. 

A mulched cover crop, or even a round of cover crops, will act to prevent soil erosion, structure the soil better, and even enrich it with nutrients. This method will help protect your beds from the rigors of winter.

How to Propagate Millets: Step by Step

Seed Selection and Harvesting

Select healthy heads of millet that are fully mature. The seeds are ready for harvesting when well formed, the heads change to golden or light brown color, and they appear dry. Cut the millet heads from the stalk, then gently thresh to extract the seeds.

If you make sure that the seeds are mature at harvesting, they will be much better in germination and hence lead to the growth of strong plants.

Cleaning and Drying Seeds

Following harvesting, the seeds should, therefore, be cleaned of residual chaff and other debris. If they require a quick rinse in water, proceed, then lay them in a single line on a paper towel or a mesh screen to dry. Let them dry in a cool, dry place for 1-2 weeks.

Make sure they are dry enough for storage to avoid growing mold or rotting. Proper drying will ensure that when you plant the seeds, they will germinate effectively.

Storing Seeds

Store the seed in a well-sealed container, such as a glass jar or in a sealed envelope. Label the envelope or jar with the date and variety of millet to keep track of it. Store the envelope or jar in a cool dry place away from direct sunlight or store it in a closed cupboard.

Ideally, use within 1-2 years, but proper storage conditions would extend its shelf life to 3-5 years.

Preparing for Planting

Source : facebook

A millet is a crop that does well on well-drained, fertile soil. Hence, prepare garden beds or containers with rich loamy soil. Sow the millet seeds only when the final frost is over and the temperature in the outdoor soil is above 60°F or 15°C, in case of direct sowing.

In the case of indoor seed trays with good seed-starting compost, the seeds are to be sown about an inch deep and 2-3 inches apart. Allow optimal conditions for germination of the seeds.

Seed Germination

Place the seed trays indoors in a warm location with natural or artificial light. It should always be kept humid. Germination of seeds should take 7-14 days. When seedlings reach a couple of sets of true leaves, it is time to move them to larger containers or directly into the garden.

Transplanting Seedlings

Harden off the seedlings by gradually exposing them to the outdoors over days. Space the seedlings the appropriate distances apart to allow for good growth about 18 to 24 inches apart.

If you're growing in large pots, use containers that are at least 12-18 inches in diameter, fill them with good potting mix, and water well after transplanting. Continue regular care for robust growth.

Potting and Repotting Millet

Potting

Potting millets are less common since they are typically grown directly in the ground. However, if you choose to grow millets in containers, it’s essential to start with the right potting setup.

  • Pot Selection: Use a large container that has a diameter of at least 12-18 inches since millet is a crop with an extensive root system. Make sure to have enough drainage in the pot to prevent waterlogging and root rot.
  • Potting Media: A good and well-drained, vegetable- or herb-specific potting mix should be used. Such media should only hold their moisture but allow it to drain out easily.
  • Planting: Fill the container with potting mix, leaving about 1-2 inches at the top. Sow millet seeds about 1 inch deep or transplant seedlings at the same depth. Water lightly and keep the soil damp until the seeds sprout.

Repotting

Young millet plants may need repotting once they have outgrown their pot or if the potting mix has become depleted.

  • Timing: Repot when the growth is stunted, the roots come out of the drainage holes, or if the soil dries way out much faster than usual. 
  • Procedure: Gently transplant the millet plant into a pot that is 2-4 inches wider in diameter than the earlier one. If there is a bound of roots, gently loosen them. 
  • Replanting: Transfer the plant into a new pot, filling it with fresh potting mix up to the level of the plant base in the previous pot. Water well after repotting to settle the soil and reduce any transplant shock.

Harvesting Millets

Now that you've successfully grown your millet, it's time to reap the rewards of your hard work. Knowing when and how to harvest millet is crucial for obtaining the best yield and quality.

Source : instagram

When To Harvest

  • Color Change: Millet's heads turn from green to golden or brown.
  • Seed Firmness: Press seeds with your fingernail; if they resist denting, they're ready.
  • Moisture Content: Ideal is 15-20% moisture.
  • Days After Flowering: Typically 20-30 days, depending on variety.

How To Harvest

When your millet matures to harvest, select the first dry day of the week to help avoid moisture-related problems. Cut off the stalks with sharp shears or a sickle. Leave about 6 inches below the seed heads. Then, bundle these cut stalks into small groups and hang them upside down in an area with good ventilation to dry for 7-10 days.

After the plants have dried completely, thresh the seeds by beating the seed heads gently over a clean surface to let the seeds fall out. Winnowing is the last stage of this process, where the chaff will be blown away by lightly blowing air over the seeds or with the help of a fan.

Types of Millet Plants

Source : instagram

Various types of millets have their specialty. We have listed out some of the most common millets found worldwide.

Pearl Millet (Pennisetum glaucum)

Pearl millet is the most widely cultivated millet type and has a very drought-resistant and heat-tolerant nature. Both human consumption and animal feed benefit from this crop, hence making it versatile and of great value in arid and semi-arid regions.

Foxtail Millet (Setaria italica)

Foxtail millet is one of the oldest millet cultivars, recognized for its quick-growing property and resistance to drought. This cultivar is more common in East Asian cuisines, specifically due to its robust nature and ability to grow under unfavorable conditions.

Finger Millet (Eleusine coracana)

Finger millet, popularly known as Ragi, is rich in calcium and other such vital minerals. It forms an integral part of African and Indian cuisine because it provides nutrition and also because of the many uses this grain has in various dishes.

Proso Millet (Panicum miliaceum)

Proso millet, sometimes called common millet or broomcorn millet, has an extremely short growing season, which, coupled with its drought tolerance, makes it adaptable to many different climates. It is primarily used in birdseed mixtures where its value lies in its ability to grow in poor conditions.

Barnyard Millet (Echinochloa frumentacea)

This is one of the fastest-growing millets, which produce harvestable grain within just 45 days. It is one of the millets resistant to both drought and waterlogging, hence grows well in all climatic conditions. It is a very popular millet in Japanese and Korean cuisines