Gardens are incomplete without the tall blooms of hollyhocks which with their tower-like flowering add an element of tradition to any garden. These are often biennial or perennial plants valued for their remarkable vertical growth, drought tolerance, and diverse hardiness to soil and climate.
This guide covers basic information about how to grow hollyhock, as well as how to take care of this flower. From choosing the perfect site to preparing the soil, planting them, and caring for them, all tricks are found within this guide.
What Is Hollyhock?
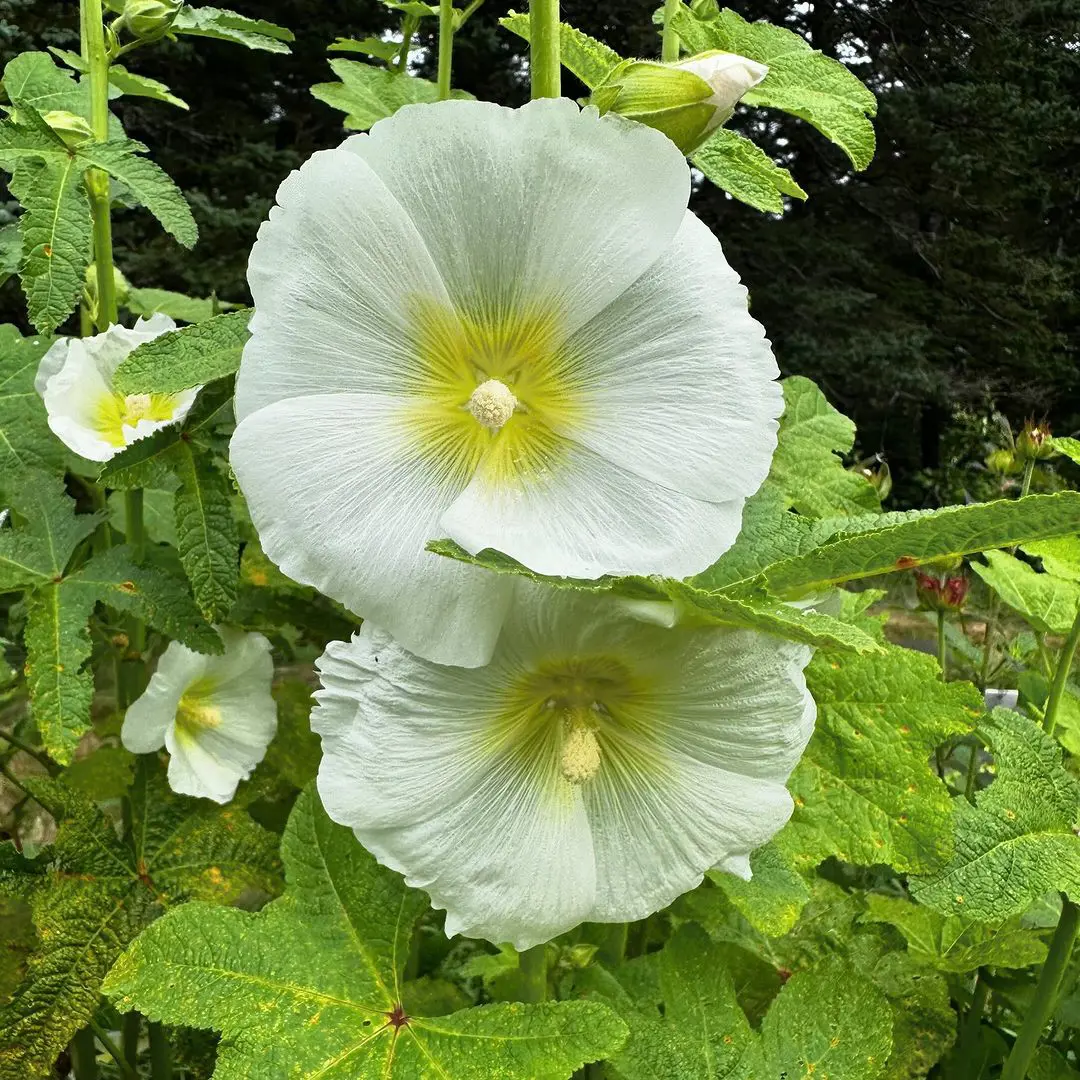
Hollyhock is a biennial or short-lived perennial plant with having high stem with colorful flowers of great size on tall spikes. Originally grown in Asia and Europe, hollyhocks have earned a rightful place in the gardens of numerous countries.
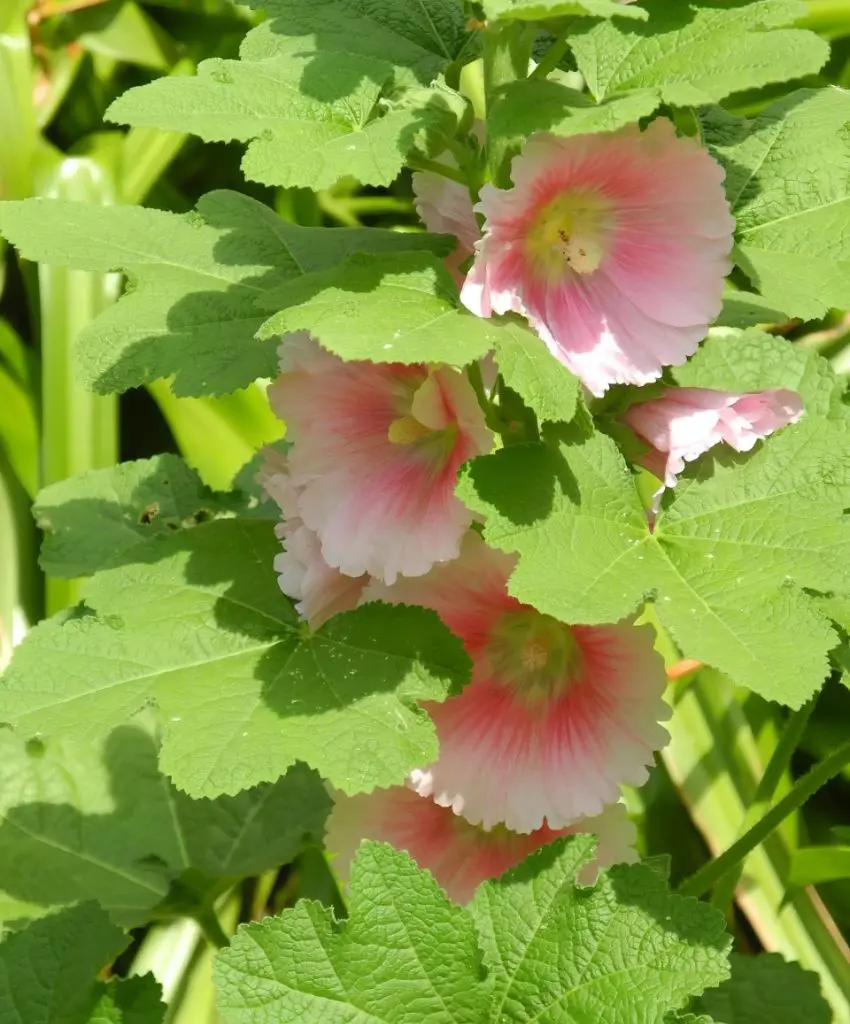
They are admired due to their capability of developing vertical interest and rich color tone in the garden beds as well as borders. These plants have tall stems, growing up to 8 feet, and as such, they form a perfect background for low-lying plants.
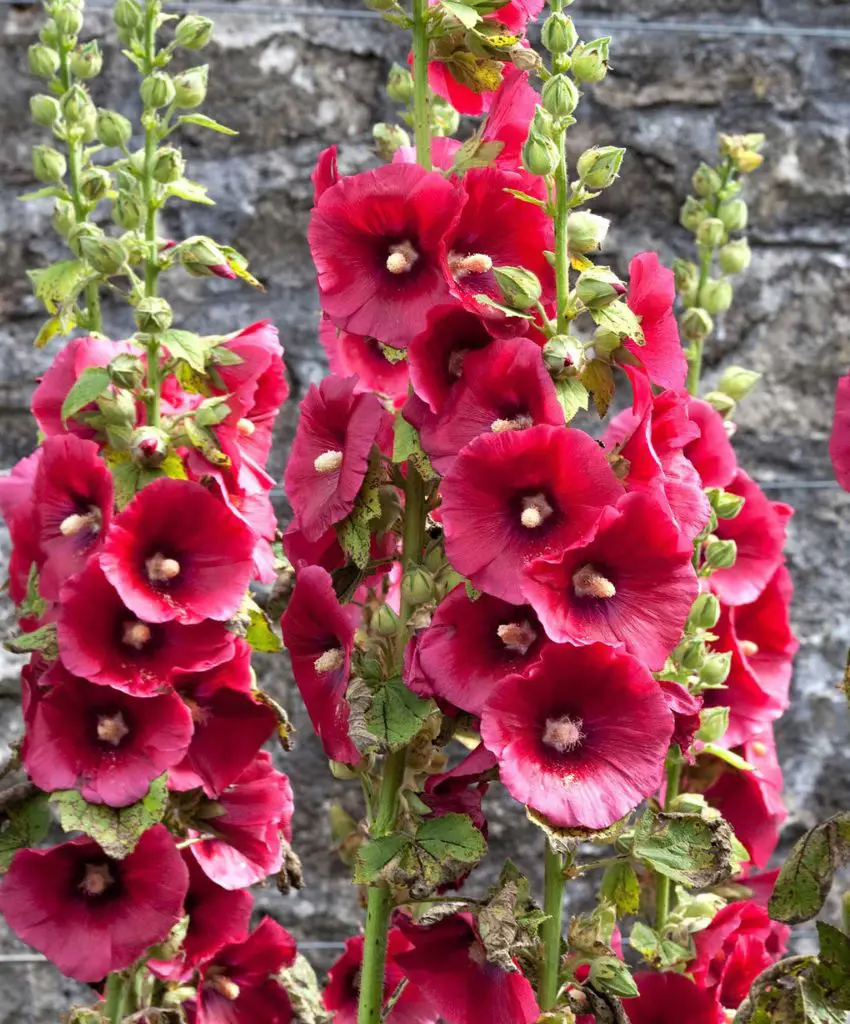
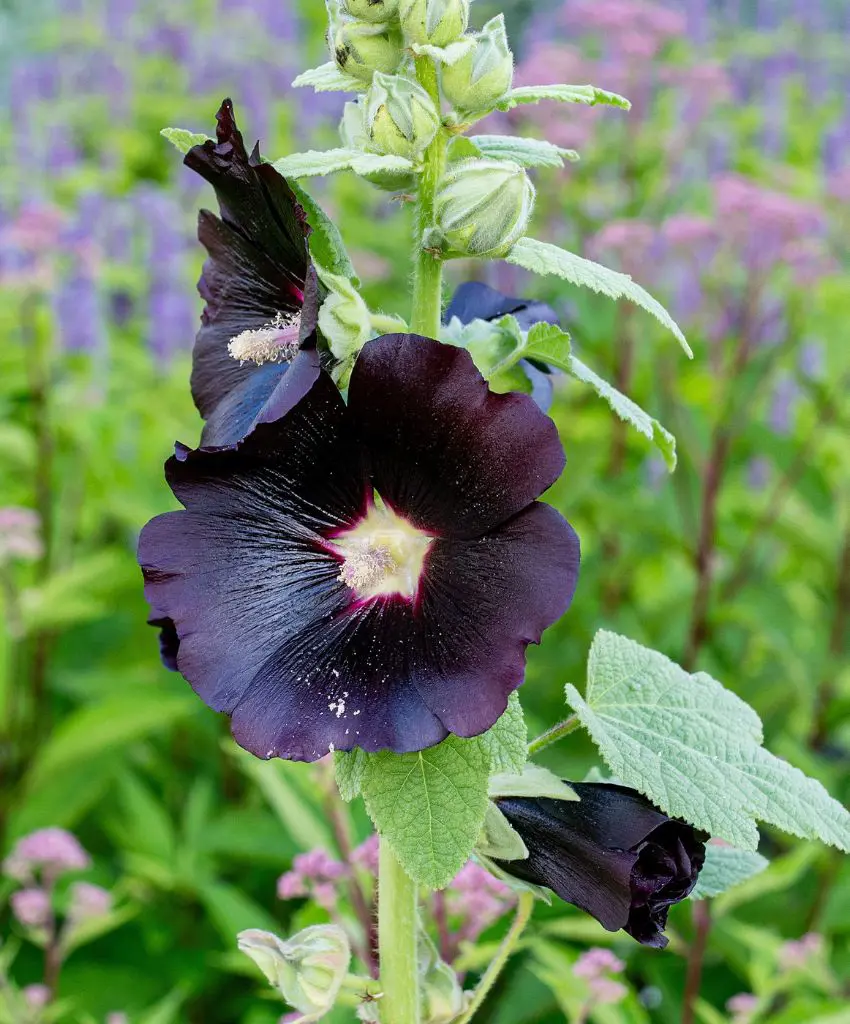
Their flowers are typically pinks, reds, yellows, whites, and purples which encourage bees and butterflies and other insect and small animal pollinators thus enriching your garden.
As for the choice of the place for planting the Hollyhock plant, one should learn more about its requirements to grow. The following are certain requirements associated with this plant:
Climate
Hollyhocks are best grown in regions with moderated temperatures and therefore grow well in the USDA hardiness zones of 3 to 9. They are most effective in areas that have cold winters as they need cold treatment to ensure good germinations and plant growth.
In areas where winters are comparatively mild, hollyhocks may not do so well because the lack of cold can actually slow the plants and their ability to bloom.
This means that gardeners in warmer climates are still able to grow the plants but they have to trick them into ‘thinking’ it is cold outside by giving the seeds a cold treatment or stratification.
Light
For hollyhocks to grow to their optimum potential, they require a full sun exposure. To develop those distinctively slender-stemmed, stout flower spikes, the plants require at least 6 hours of sun exposure daily.
Hollyhocks need partial shade but they do not thrive well if they do not receive enough sun so they will not grow to their full potential or bloom all that much. In rather shady conditions, plants grow tall and weak and may develop diseases as air circulation is limited and moisture is frequent on the leaves.
Soil
The plant thrives best in soils that have good drainage, are loamy, and with a soil pH of 6. 0 to 7. 5. It is required because hollyhocks do not tolerant water logging and they suffer from root rot and other fungal diseases in wet soils.
In case your garden has poor soil cover, which may be either clayey or sandy, you can enhance the condition of the soil through the addition of organic materials like compost or well-decomposed manure.
Amending the soil with organic matter helps improve the structure of the soil, encourages proper root development and also supply nutrients in the plants.
For planting the hollyhock, one should select a sunny spot with good drainage. Plant seeds in the soil in mid-spring or early summer and water them while allowing about 12 to 18 inches of space between each seed. Bury it slightly and irrigate, do not use force while watering.
It grows well in rich and loamy soil, so it may be good to add compost to the soil. Ensure the soil is damp but avoid lengthy water soaking since seeds germinate. Once seeds are planted on the ground, you need to thin them to ensure they have enough space to grow.
Depending on the species, hollyhocks take one year to reach blooming size but produce tall, colourful spikes of flowers in the second year. Give the plants a little boost if needed and always remove the faded flowers to welcome new blooms.
Once you plant Hollyhocks in your home, there are certain steps you should take to take care of the young plant. The following steps provide helpful tips to take care of your plant:
Watering
The best advice that can be given regarding the cultivation of hollyhocks is their watering, which should be frequent and regular. In its early stages, hollyhocks require frequent irrigation as the root system establishes itself.
Make sure the soil is kept moist at all times but should not be boggy because this might cause root rot.
After some time, the plants adapt to the dry climate, though occasional watering is desirable, particularly during periods of drought. Water hollyhocks at the base of the plant since watering the foliage may defeat the purpose through the promotion of fungal diseases.
Fertilizing
Hollyhocks is not demanding when it comes to fertilizing but this plant responds positively to proper fertilizing. At the planting stage, mix a slow-release, chemical-balanced fertilizer into the soil to sustain it for the period of growth.
Recommended fertilizer is the general-purpose fertilizer that contains 10 % nitrogen, 10% phosphorous, and 10% potassium. Also, one can use a side dressing of compost or a balanced liquid fertilizer mid-summer that will foster more flowers and vigor of the plant.
Staying away from fertilizers with a high nitrogen concentration is recommended since they fasten the growth of leaves to the detriment of blooms.
Like any flower, Hollyhocks require proper attention for better blooms. As you will see several crucial elements are required to accomplish this. Here, we have brought a comprehensive care guide for Hollyhock plants:
Pre-Plantation Care
Sowing hollyhock seeds indoors is also useful for the early planning of hollyhocks in areas with short vegetation periods. Start by immersing the seeds in water and allowing them to soak overnight to enhance germination chances.
Plant the seeds in seed trays or pots and use a good quality seed-raising mixture making the sowing about 6-8 weeks before the last expected frost in your area. Put the trays in a warm and well-lit environment with a temperature range of 70°F or 21°C.
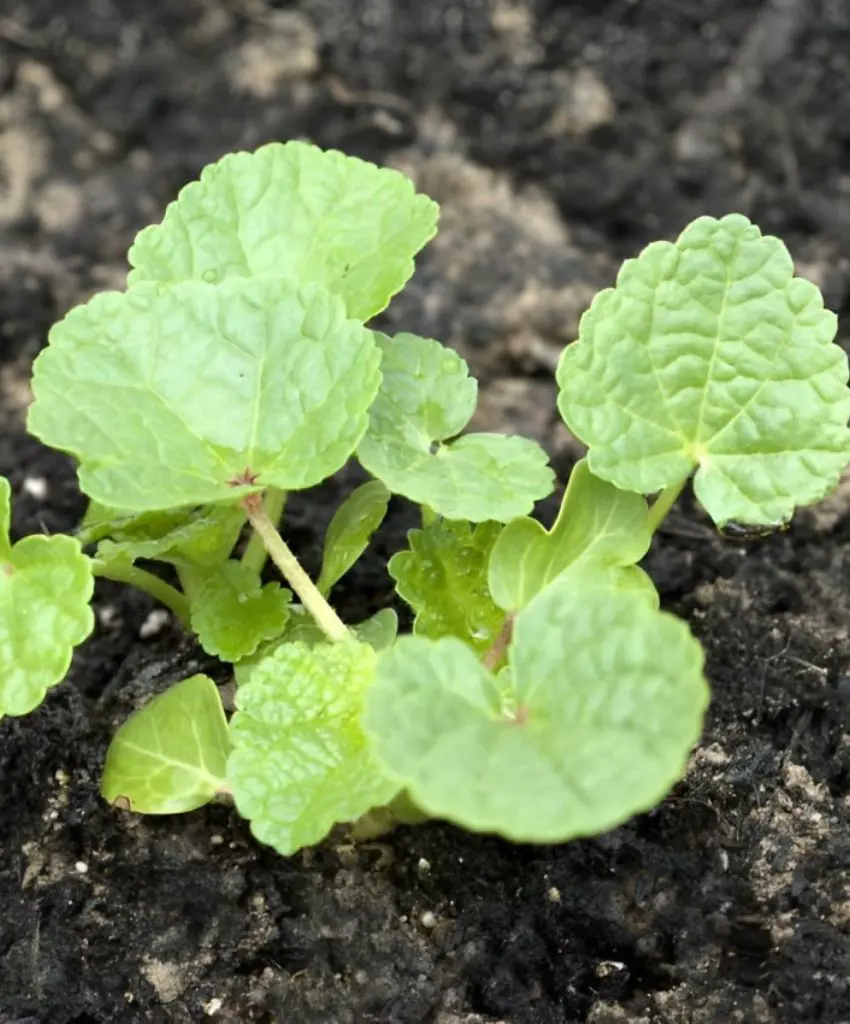
Sprouting normally takes about two weeks or between 10 to 14 days. When the seedlings have formed two or three true leaves, transplant them into pots and acclimatize them by putting them outside during the day and bringing them in at night for a week.
Plantation Care
Finally, after frost has become a distant threat and the seedlings have been properly hardened off, they can be transplanted into the garden. Plant them in a region that is exposed to direct sunlight and has good drainage systems.
Plant them 18-24 inches apart as this will ensure that there is enough space for air to circulate together with the size at which the plants grow. It is advisable to assist the transplants by providing adequate water right after planting so that they can adapt to the new conditions easily.
They require support due to their height, especially during windy moments owing to their nature of falling over when in a towering state. For support, one can employ stakes, bamboo canes or even plant supports to ensure that the stems do not droop.
Post-Plantation Care
Watering
Hollyhocks require consistent moisture especially when growing them in regions that hardly receive adequate rain. Although it is moderately resistant to drought, especially once established, it benefits from frequent watering to maintain vigorous greens and flower production.
Water the plants thoroughly starting from where their stems and branches emerge and then allow the soil to get a little dry before watering again. Watering should be done thoroughly but sparingly, and this can be helped by applying mulches around the plants.
Mulching
Placing a 2-3 inch layer of organic mulch around the base of hollyhocks has several advantages. They aid in water conservation by preventing water evaporation, eliminating weeds, and controlling soil temperature.
Straw, wood chips, shredded leaves, etc are examples of mulch that include organic forms of materials. Remember to leave a space of a couple of inches in between the stems of the plant and the mulch layer as this can cause rotting and lack of air circulation.
Pruning
The hollyhock requires constant care which includes pruning and deadheading whereby the dried flowers are clipped to enhance its proper growth. Deadheading is beneficial as it promotes more blooms and also helps the plant avoid using energy for growing seeds.
This involves using clean and sharp pruners to mark dead flowers and cutting back branches with any disease signs. If the foliage gets diseased, it is best to remove the stems to the ground level after the first frost in late fall or after the autumn flowering season.
Overwintering
These flowering plants are usually very strong and able to cope with cold winters but a little protection can go a long way in areas that this plant is not used to. In regions where temperatures drop at night use a thick layer of mulch or straw around the crowns of the plants to avoid freezing.
This layer aids in protecting the roots from frost by providing a barrier against the cold. After plants start growing in early spring, the mulch should then be pulled aside. Sow the hollyhock seeds in spring in well-draining soil, as some species may self-seed and produce new plants each year.
Staking
Hollyhock plants have tall stems. In such cases, you can apply wooden or bamboo stakes. Secure the stakes by gently tying the stakes to the stems of the plants with the help of soft garden twine or plant ties, especially during the windy season.
Some of the pests and diseases that affect Hollyhocks are listed as follows:
Pests
Aphids:
Aphids are very tiny 1-2 millimeters in size and the hollyhocks mostly infested with them are on the undersides of the leaves and flowers. The leaves of the plant develop a curl, are twisted, and become yellow when aphids feed on it.
The aphids also excrete a substance known as honeydew, which draws ants and, in turn, sooty mold fungus. Some control methods include; rinsing them off with water, using pesticide soap, or introducing natural enemies such as lady beetles.
Japanese Beetles:
These are shiny green beetles from Japan that feed on hollyhock leaves, flowers, as well as buds with only the veins left behind. When they are abundant, they can wreak havoc by stripping plants of their foliage.
Management includes hand-picking beetles, using traps, spraying neem oil, or applying systemic insecticides for serious outbreaks.
Spider Mites:
Spider mites are very small insects that have the hollyhock leaves as their food source, they produce white speckles and webs. They are most active in dry environments and can lead to wilting, browning, and shedding of the leaves.
Limiting spider mites includes raising the surrounding relative humidity, applying insecticidal soap, or releasing natural enemies.
Diseases
Rust:
Rust looks like orange or yellow small vesicles on the lower side of hollyhock leaves. It infects wet environments and leads to premature shedding of leaves.
Some control measures are; adequate ventilation, pruning the affected leaves, and spraying fungicides that control rust.
Powdery Mildew:
Forming white, powdery masses on leaves, stems and buds is how powdery mildew affects the plant. It prefers warm and dry conditions and is a slow-acting fungus that can gradually debilitate affected plants.
To deal with powdery mildew, hollyhocks should be grown in full sun, well-ventilated areas, and the affected plant parts should be trimmed off and the fungicides used where necessary.
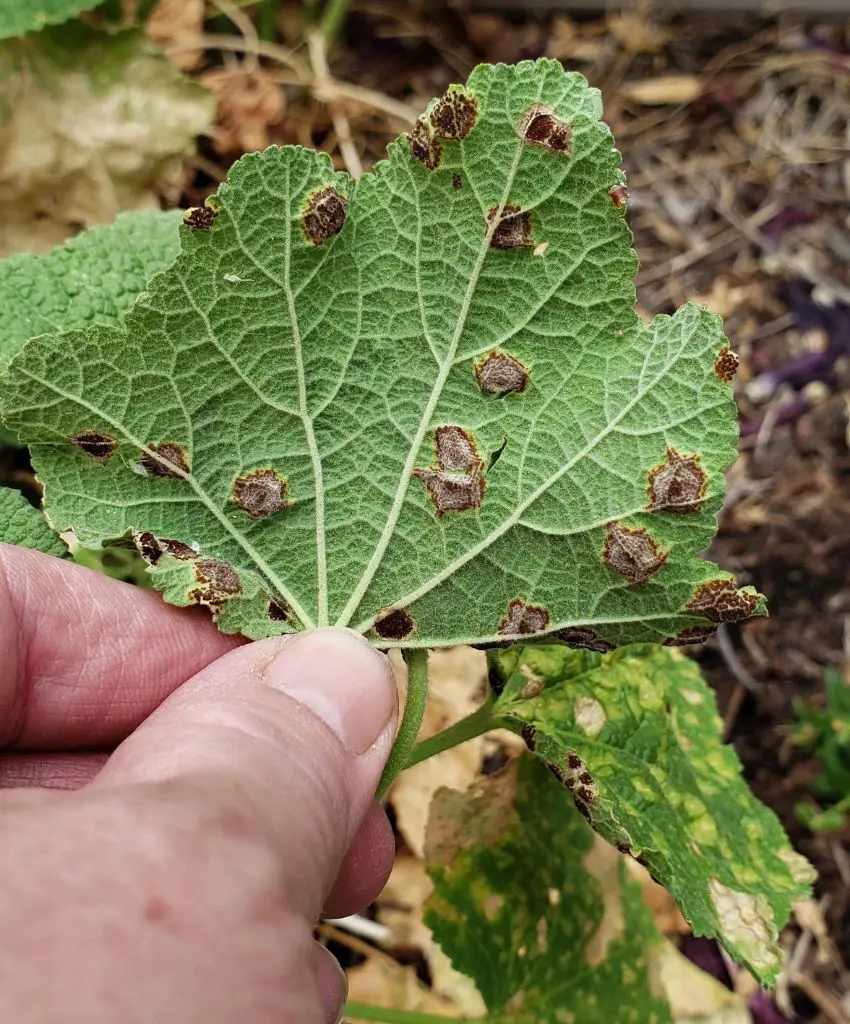
Leaf Spot:
Small, dark lesions appear on the leaves of hollyhocks affected by leaf spot diseases and may grow larger and cause further damage such as loss of leaves. These diseases are transmitted by water splashing on the leaves.
Possible management measures for controlling leaf spots include the removal and proper disposal of affected leaves, proper gardening practices, and fungicide application as a last resort.
Pest and disease control on hollyhocks can only be achieved if there is constant check and follow-up action once they have been identified. You should regularly examine your plants for pest or disease problems.
In cases of minor pest presence, physical removal using a hand pick or using water pressure can be used. For more stubborn pests, the eco-friendly insecticidal soap or neem oil can be applied as these do not affect beneficial insects or the surrounding ecosystem.
To prevent fungal diseases
Proper spacing of plants is also necessary to let enough fresh air circulate the plants.
Do not water on the plant top; water your plants at the base to minimize contact with the foliage.
Spray an ornamental grade fungicide if rust, powdery mildew, or leaf spot is apparent on the foliage.
Prune damaged plant parts and discard them off your compound to help reduce the spread of the disease.
Maintaining plant health is essential as disease and pest-resistant crops are healthier and can moderate stress factors associated with their growth. Also, providing optimal growing conditions: the right amount of sunlight, the right soil texture, regular and correct watering, and fertilization is equally important for the plant to flourish.
If you follow these guidelines, you can achieve the goal of proper cultivation and care of hollyhocks in a garden and appreciate their tall stems, beautiful shades, and cheerful appearance. If you take good care of it, hollyhocks can be great additions to your garden with a hint of traditional charm.