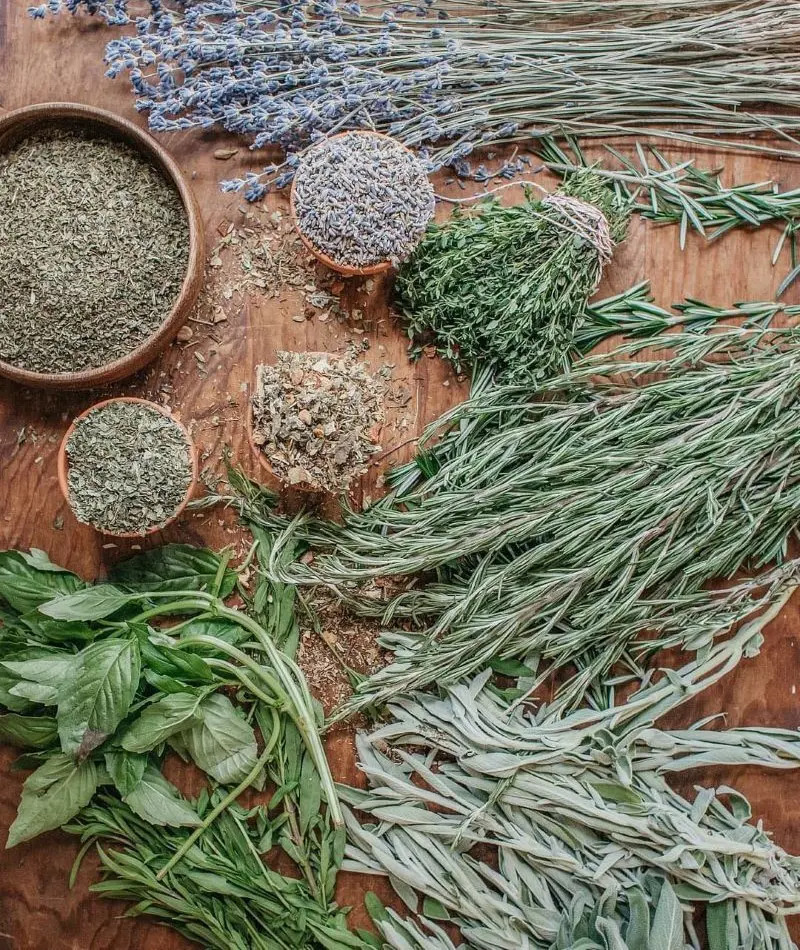
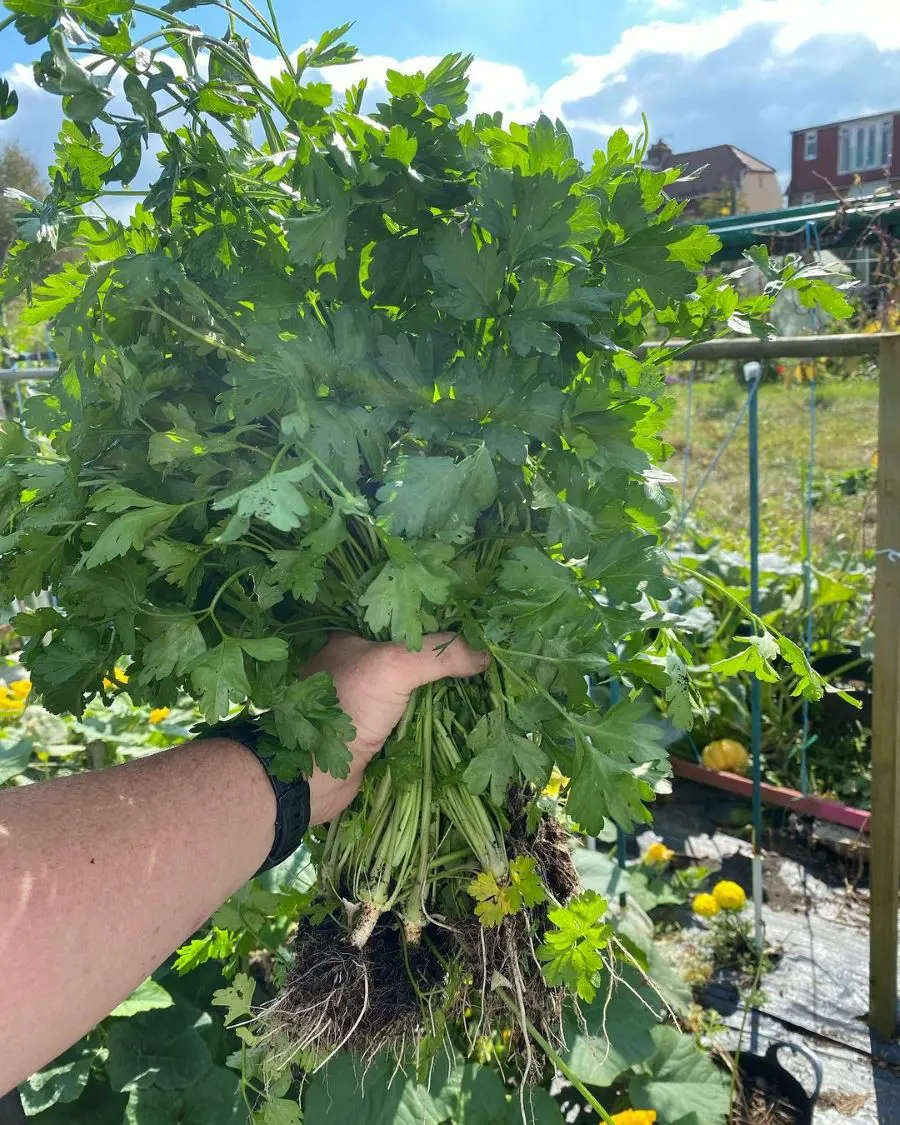
Fresh herbs do not last long even when you store them properly, and they are scarce during the off-season. The best way to extend their shelf life and ensure you can enjoy them throughout the seasons is by drying them.
Dried herbs can be used for a long period and add as much flavor to any dish as fresh herbs. If you are interested in learning how to dry herbs at home, here are 12 different methods you can try.
1. Air-Drying
Air Drying is a straightforward way to preserve herbs. Gather your herbs and remove damaged or discolored leaves. Tie the stems into small bundles using rubber bands, ensuring the bundles are not tightly packed to allow airflow.
Hang the bundles upside down in a dry, dark, and well-ventilated area, such as a closet or a room with a ceiling fan. Ensure the area has low humidity to prevent mold. After a few weeks, crumble a leaf, and if it breaks easily, the dried herbs are ready for storage.
2. Oven Drying
To dry herbs in oven, preheat your oven to the lowest setting of 150-200°F (65-93°C). Spread the herbs evenly on a baking sheet without overlapping to promote even drying. Place the sheet in the oven and keep the door slightly open to allow moisture to escape.
Check the herbs every 15-30 minutes, turning them occasionally to ensure uniform drying. The drying can take 1-3 hours. Once the herbs are crisp and brittle, remove them from the oven and let them cool completely before storing them in airtight containers.
3. Dehydrator
Another method is using a dehydrator to dry herbs. Wash the herbs and pat them. Strip the leaves from the stems, discarding any damaged parts. Arrange the herbs in a single layer on the dehydrator trays and set the dehydrator to the lowest temperature.
Drying time will take 1-4 hours. Check the herbs periodically; perfectly dried crumble easily between your fingers. This method is suitable when you have large quantities of herbs and outdoor drying is not possible because of humid or rainy weather.
Microwave-drying herbs are best suited for small quantities and when you need herbs dried fast. To use this method, place clean herbs between two paper towels on a microwave on high for 20-30 seconds. Continue microwaving in short intervals for 1-3 minutes in total.
This rapid drying retains the herbs' color, flavor, and essential oils. It is best for drying delicate herbs like basil, mint, and parsley, where maintaining their aromatic qualities is crucial. However, take care not to burn them, which can happen quickly.
5. Fan Drying
Using a fan to dry herbs speeds up drying by improving air circulation. To dry herbs using a fan, spread herbs on a clean, dry cloth or paper towels in a single layer and place them in front of a fan set to a low to medium speed. The fan should be blowing gently over the herbs without scattering them.
This method is useful in humid environments where natural air drying increases the risk of mold. This technique is ideal when you need to dry herbs fast and want to avoid the potential heat damage from ovens or microwaves.
6. Desiccant Drying
Desiccant drying uses materials like silica gel to soak up moisture from herbs, keeping their flavor and potency intact. Put a layer of silica gel in an airtight container, then place the herbs on top, avoiding contact. Cover the herbs with more silica gel, seal the container, and store it in a cool, dark place.
Check after a few days to see if the herbs are dry. This method works well for fragile herbs like basil or mint that might lose their oils if dried with heat. It is also great for humid areas where air drying does not work well.
7. Sun Drying
Sun drying utilizes sunlight and warm temperatures to dry herbs. Start by harvesting, rinsing, and patting dry fresh herbs. Spread the herbs in a single layer on a baking sheet, screen, or cloth. Place them in a sunny, well-ventilated spot, raised off the ground for better airflow.
Turn the herbs regularly to dry them evenly. Also, protect them from the strong midday sun by covering them with a thin cloth or putting them in partial shade. This method works best in warm, dry climates with low humidity, especially in late summer and early fall.
Drying herbs on a rack is easy and effective. First, get a clean mesh or wire rack and put it in a warm, dry spot without direct sunlight to keep the color and flavor of herbs. Spread the herbs in a single layer on the rack without overlapping them.
This method works well for drying large amounts of herbs or when you have limited space, as you can put the rack on a counter or shelf. It is best during dry weather, as it helps keep the herbs' natural oils and flavors intact.
9. Paper Bag
The best part about the paper bag method is that it only requires paper bags. Start by gathering herb stems into small bunches and ensure they are not wet. Put the bundles in a brown paper bag with enough space around each bunch for air to circulate.
Fold the top of the bag to close it and poke a few small holes for ventilation. Hang the bag in a warm, dry spot with good airflow, like a pantry or kitchen corner. This method protects herbs from dust, light, and bugs as they dry and prevent mold.
10. Pasta Machine
Using a pasta machine to dry herbs might be something you have never heard of. It involves involves flattening them to help them dry faster. Start by washing and drying the herbs, then pass them through the pasta machine to make them thin and flat.
After that, spread them out on a drying rack or screen to let them dry in a well-ventilated spot. This method is ideal for small, delicate herbs like basil or parsley because it speeds up drying and keeps their flavor, but it might not work well for larger or tougher herbs.
11. Salt Drying
Salt drying involves using salt to draw moisture out of herbs. Start by putting a layer of coarse salt in a jar or container. Place a layer of herbs on top, then cover them with more salt. Keep layering until the jar is full, ending with a salt layer.
The salt absorbs the moisture from the herbs, helping them stay dry. This method is suitable for herbs with a lot of moisture, like basil and cilantro. However, it can make the herbs taste salty, so it is best for recipes where you can adjust the salt levels.
Refrigerator drying involves using cool, dry air inside the fridge to remove moisture from the herbs slowly to dry them while preserving their color and flavor. To dry herbs in the refrigerator, lay them on a tray lined with paper towels and put them in the fridge.
Check them often, and change the paper towels if they get damp. This method is perfect for small batches of herbs that you want to dry gradually without using extra tools or heat.
What are Herbs?
Herbs are aromatic plants that do not produce a woody stem and are primarily used for flavoring food. They have soft, succulent tissues that result in tender, green stems. They complete their life cycle in one, two, or many growing seasons and die back to the ground at the end of each growing season.
The most commonly used part of herbs is the leaves. They possess distinct and pleasant smells and contain essential oils responsible for flavor and aroma, making them a staple in many dishes. The essential oils also have therapeutic properties and are often used for healing.
Benefits of Drying Herbs
Extended Shelf Life
Drying herbs helps them last for months or even years without spoiling. When herbs are dried, the moisture is removed to prevent bacteria and mold growth. A long shelf life means you can use your favorite herbs well after their growing season.
Keeping dried herbs in airtight containers in a cool, dark place also helps them stay fresh longer. They are a handy and reliable addition to your kitchen.
Enhanced Flavor
Dried herbs have a stronger flavor than fresh ones because drying removes the water, leaving the essential oils and flavor compounds more concentrated. This flavor enhancement means you need fewer dried herbs to get a strong taste in your cooking.
Dried herbs can make your dishes richer and more intense. They are great for seasoning, marinades, soups, stews, and other recipes that need a bold flavor.
Cost-Effective
Drying herbs saves money because you can preserve herbs you have grown or bought in bulk instead of purchasing small, expensive packets of dried herbs. Fresh herbs can be pricey and often spoil before you use them all.
This is especially helpful for gardeners with lots of herbs at harvest time. Dried herbs stay good for months, so you do not have to buy fresh ones as often, which can be expensive, especially out of season. This way, you always have an affordable supply of herbs for cooking.
Convenience
Drying herbs makes cooking easier because you will always have seasonings on hand. Once the herbs are dried and stored in containers, they are simple to grab and use whenever needed.
This convenience is helpful if you are busy or when fresh herbs are scarce. You can quickly add dried herbs to your dishes, saving extra trips to the store and making meal prep more convenient.
Space-Saving
Dried herbs save space because they are much smaller than fresh herbs. Fresh herbs need a lot of fridge space and can spoil quickly. Dried herbs, on the other hand, can be stored in small jars or containers in your pantry or cupboard.
This is especially helpful if you have limited space or grow a lot of herbs. Additionally, dried herbs do not wilt or spoil, so they are easy to keep for a long time.
Drying extra herbs helps you avoid wastage. When you have more fresh herbs than you can use before they go bad, drying them keeps them usable for a long time.
This way, you can store and use the herbs later instead of throwing them away. It is a smart way to manage your herbs and ensure you get the most out of what you grow or buy. It is also safe for the environment since it reduces food waste.
Versatility
Dried herbs are versatile and can be used in many ways. You can use them to season dishes like soups and sauces, adding extra flavor. They’re also great for making herbal teas or adding to hot water to get their taste and benefits.
You can mix them into spice blends or rubs for meats and vegetables or use them to infuse oils and vinegar. This versatility makes dried herbs handy for everyday meals and special recipes.
Nutrient Retention
Drying herbs properly helps keep their nutrients and beneficial compounds intact. By removing moisture, you slow down the breakdown of vitamins and antioxidants.
To best preserve these nutrients, dry herbs at low temperatures and avoid direct light, which can reduce their effectiveness. Well-dried herbs still offer many health benefits and can be a great addition to your diet.
How to Store Dried Herbs
To store dried herbs effectively, follow these steps:
Use Airtight Containers
Storing dried herbs in airtight containers is important for keeping them fresh. Containers like glass jars with tight lids or plastic bins that seal well stop air and moisture from getting in.
This tightness helps keep the herbs’ flavor and smell strong. Without a good seal, air can make herbs go stale, and moisture can cause mold. Using airtight containers helps your dried herbs stay good for a longer time.
To keep dried herbs fresh, store them in a cool, dark place. Heat and light can make herbs lose their flavor and color over time. A cool spot slows down this process, and keeping them out of the light protects them from UV rays that can break down their good qualities.
Good storage places include a cupboard, pantry, or drawer away from heat and sunlight. This helps keep your herbs tasty and effective for longer.
Label and Date
Label your dried herbs with their name and the date they were dried. This way, you will know how long they have been stored and can use the older ones first.
It also helps you remember what is in each container so you do not mix up different herbs. This simple step helps keep your herbs fresh and flavorful.
Avoid Humidity
To keep dried herbs from getting moldy, ensure everything is dry before you store them, meaning both the herbs and the containers should be moisture-free. Moisture can cause mold, which ruins the herbs.
Using moisture absorbers, like silica gel packets, can help keep the inside of the container dry, especially in humid areas. This way, your dried herbs will stay fresh and flavorful.
Crush Before Use
Crushing or grinding dried herbs before you use them helps release their full flavor and smell. Dried herbs have their flavors locked inside, and breaking them up allows these flavors to spread into your food more easily.
Whole dried herbs keep their flavor longer, but they won’t flavor your dishes as well until you crush or grind them. This way, you get the best taste and aroma from your dried herbs.