How To Grow

How To Plant, Grow And Care Soursop

Source : instagram

Soursop can be enjoyed fresh, in smoothies or desserts, and its leaves are used in traditional medicine. To reap these benefits, growing a soursop tree requires a warm, tropical environment and patience.

Although it takes a few years to mature and bear fruit, the large, spiky green fruit with its creamy, tangy flesh is well worth the wait. Proper care, including regular watering and adequate sunlight, is crucial for a healthy tree and an abundant harvest.

Where & When To Plant Soursop?

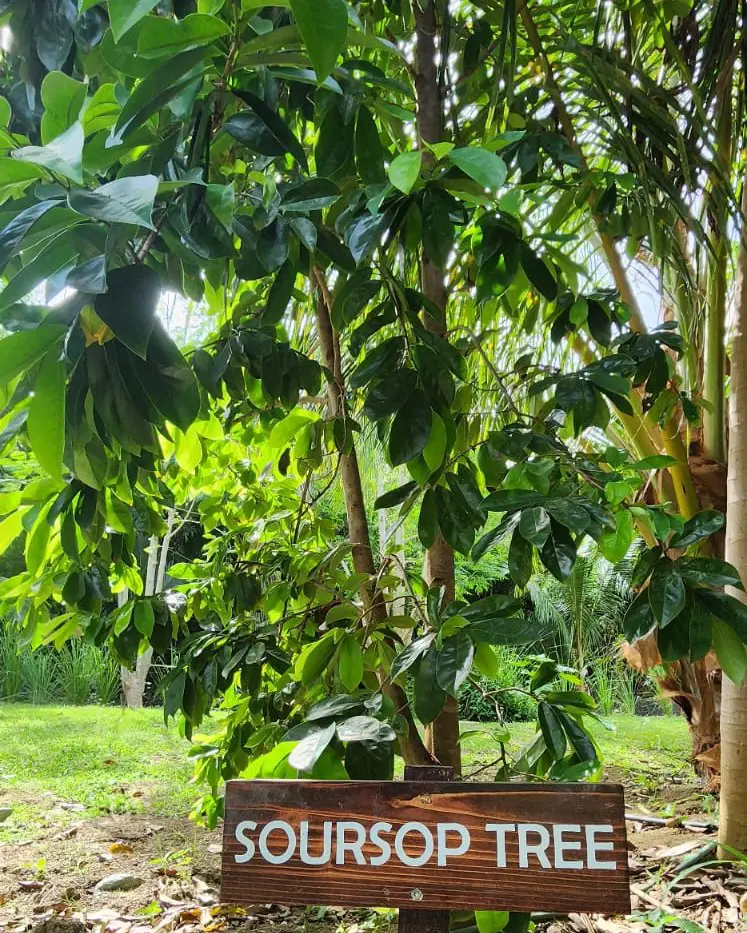
Soursop (Annona muricata), also known as graviola or guanabana, is a tropical fruit tree native to the Caribbean and Central America. It thrives in warm, humid environments and can be successfully grown in USDA zones 10-11. 

The best time to plant soursop is during the rainy season, which ensures the young trees receive ample water to establish their root systems.

Light

Soursop trees require full sun to produce abundant fruit. They should be planted in a location that receives at least 6-8 hours of direct sunlight daily. Adequate sunlight is crucial for the tree’s growth, flowering, and fruiting.

Insufficient light can lead to poor growth and reduced fruit yield. When planting soursop, choose a site that is not shaded by other trees or structures to ensure they receive optimal sunlight exposure.

Spacing

Proper spacing is essential to allow soursop trees enough room to grow and spread their branches. Plant soursop trees at least 15-20 feet apart to accommodate their mature size, which can reach up to 30 feet in height and 20 feet in width.

Adequate spacing ensures good air circulation, reducing the risk of fungal diseases and allowing easy access for maintenance and harvesting. Crowded conditions can lead to competition for nutrients and water, affecting the overall health and productivity of the trees.

Soil

Source : pexels

Soursop trees prefer well-draining, sandy loam soils rich in organic matter. The ideal soil pH for soursop is slightly acidic to neutral, ranging from 5.5 to 7.5. Good drainage is crucial to prevent waterlogged conditions, which can cause root rot and other issues.

To improve soil fertility and structure, incorporate compost or well-rotted manure before planting. Mulching around the base of the tree can help retain soil moisture, regulate temperature, and suppress weed growth.

Planting Time

The best time to plant soursop is at the beginning of the rainy season when the soil is moist and conducive to root development. This timing varies depending on the region but generally falls in the spring or early summer months. Planting during this period ensures the young trees receive consistent rainfall, which is essential for establishing a strong root system.

If planting during the dry season, provide regular irrigation to keep the soil consistently moist but not waterlogged. Once established, soursop trees require less frequent watering, but it’s essential to maintain adequate soil moisture during flowering and fruiting stages to ensure healthy fruit development.

How To Grow Soursop: Step-By-Step Instructions

Growing soursop in your home can be a rewarding experience, resulting in delicious, tropical fruit. Here’s a detailed guide that explains how to grow soursop from seeds successfully-

Step 1: Obtain Fresh Seeds

To successfully grow soursop from seeds, starting with fresh, viable seeds is crucial. You can purchase fresh soursop seeds from a reputable supplier or extract them from a ripe fruit. If you choose the latter, make sure to clean the seeds thoroughly to remove any pulp or residue, as any remaining fruit material can hinder germination or attract mold and pests.

As fresh seeds have the highest germination rate, so it's best to plant them as soon as possible after extraction.

Step 2: Prepare the Potting Mix

A well-draining potting mix including equal parts of peat moss, sand, and compost is essential to prevent waterlogging, which can lead to root rot and other fungal issues. Wondering why? Peat moss helps retain moisture, sand ensures good drainage, and compost provides essential nutrients.

To further ensure the health of your seeds, sterilize the potting mix by baking it in the oven at 180°F (82°C) for 30 minutes. This step kills any pathogens or pests that might be present in the soil.

Source : instagram

Step 3: Prepare the Pots/Trays

Selecting the right pots is equally essential for the early stages of soursop growth so, choose small pots or seedling trays that have good drainage holes to prevent water accumulation at the bottom. Next, clean the pots thoroughly before use to remove any dirt or residue that could harbor pests or diseases. 

Step 4: Fill the Pots

Once your pots are ready, fill them with the prepared potting mix but leave about an inch of space from the top to allow room for watering. Gently press the soil to eliminate air pockets but avoid compacting it too much, as this can impede root growth and water drainage.

Step 5: Plant the Seeds

Now, plant the soursop seeds about half an inch deep into the soil. Place one or two seeds per pot and cover them lightly with soil. Avoid planting too deep, as they must be close enough to the surface to receive adequate warmth and light for germination.

After planting, gently water the soil to settle it around the seeds, ensuring good seed-to-soil contact.

Step 6: Create a Humid Environment

Soursop seeds require a humid environment to germinate successfully. To this end, cover the pots with a clear plastic bag or plastic wrap to create a mini greenhouse effect and retain moisture and warmth, which are essential for seed germination. 

Make sure the plastic cover does not touch the soil directly, as this can cause mold growth. Periodically check the pots to ensure the soil remains moist but not waterlogged.

Step 7: Place in a Warm Location

Soursop seeds need a warm environment to germinate, ideally between 70-85°F (21 and 29°C). Thus, to accelerate the germination process, place the covered pots in a warm, sunny location, such as a windowsill or a heated greenhouse.

However, if you live in a cooler climate, consider using a heat mat to maintain the necessary soil temperature.

Step 8: Maintain Moisture

Maintaining consistent moisture is crucial for the successful germination of soursop seeds. Therefore, check the soil regularly and water it as needed to keep it evenly moist. However, avoid overwatering, as waterlogged soil can lead to root rot and other issues.

Once the seedlings emerge, gradually remove the plastic cover to acclimate them to normal humidity levels. Then, continue to water them regularly, ensuring the soil remains moist but well-drained.

Source : instagram

How To Care for Soursop Tree

Caring for a soursop tree involves providing the right conditions and consistent maintenance to ensure healthy growth and abundant fruit production. Soursop trees, known for their large, heart-shaped fruit with a unique sweet-tangy flavor, are relatively easy to care for if you follow a few essential practices.

Proper care includes understanding the following-

Growth Habit

Soursop trees are evergreen and can grow up to 30 feet tall, with a broad, spreading canopy. The leaves are glossy, dark green, and lance-shaped, while the branches are relatively brittle and can be damaged by strong winds. These trees produce large, spiny fruits that can weigh several pounds each.

Where does Soursop grow? Soursop is a tropical fruit that thrives in warm, humid climates. It typically starts fruiting in about 3 to 5 years after planting the seeds, depending on growing conditions and care.

Source : instagram

Watering

Watering is crucial for the healthy growth of a soursop tree, especially during its establishment phase and fruiting period. The tree requires consistently moist soil but is sensitive to waterlogged conditions. During the first few years, water the tree deeply and regularly to ensure the root system develops properly.

Once established, soursop trees can tolerate short periods of drought, but consistent watering during dry spells and the fruiting season is essential. 

Fertilizing

Regular fertilization is important for providing the nutrients needed for the proper growth and fruit production. So, start by applying a balanced fertilizer (such as 10-10-10) every 2-3 months during the growing season. As the tree matures, you can switch to a fertilizer higher in potassium and phosphorus to promote flowering and fruiting.

Additionally, incorporating organic matter like compost or well-rotted manure into the soil can enhance its fertility and structure, providing a steady supply of nutrients to the tree.

Mulching

Mulching is also beneficial for maintaining soil moisture, regulating soil temperature, and suppressing weeds around the soursop tree. Therefore, apply a 2-3 inch layer of organic mulch, such as straw, wood chips, or leaves, around the base of the tree, ensuring it does not touch the trunk directly. 

This process helps conserve water, reduces soil erosion, and gradually adds organic matter to the soil as it decomposes. This practice not only supports healthy root development but also minimizes competition from weeds for nutrients and water.

Pests and Diseases

Soursop trees can be susceptible to various pests and diseases, requiring regular monitoring and management. Common pests include mealybugs, scale insects, fruit flies, and leafhoppers, which can be controlled with insecticidal soaps, neem oil, or organic pesticides.

It is also susceptible to fungal diseases such as anthracnose, and root rot can occur in overly wet conditions, so it's essential to ensure good drainage and avoid overwatering. Practicing good garden hygiene, such as removing fallen leaves and fruit, can also help prevent disease outbreaks.

End of Season Care

At the end of the growing season, it’s important to perform specific care tasks to prepare your soursop tree for the coming year and ensure it remains healthy and productive. This period involves several key practices, including the following-

Pruning

Pruning is an essential end-of-season task for maintaining the health and shape of your soursop tree. It helps remove dead, diseased, or damaged branches, improving air circulation and reducing the risk of pests and diseases.

Additionally, it helps to shape the tree, making it easier to manage and harvest fruit. By selectively removing branches, you encourage better light penetration and promote overall tree vigor, which can lead to improved fruit production in the next growing season.

Source : instagram

How to Prune

When pruning your soursop tree, start by removing any dead or diseased branches.

• For larger branches, use clean, sharp pruning shears or a saw.

• Make clean cuts to avoid leaving stubs that could attract pests or disease. 

• Focus on thinning out crowded areas to improve air circulation and light exposure within the canopy. 

• Prune back any overly long or unbalanced branches to maintain a well-shaped tree. 

• Be cautious not to remove too much foliage at once, as this can stress the tree. 

• After pruning, clean up and dispose of all pruned material to prevent any potential spread of disease.

Fertilization

At the end of the season, applying a balanced fertilizer to replenish nutrients that may have been depleted throughout the growing season is beneficial. So, use a fertilizer with equal parts nitrogen, phosphorus, and potassium or one tailored for fruit trees. This helps the tree build up reserves for the next season.

Alternatively, you can use organic options like compost or well-rotted manure. Apply the fertilizer according to the manufacturer's instructions, typically around the tree's base, and water it in thoroughly to ensure it reaches the roots.

Protection

Protecting your soursop tree at the end of the season involves measures to shield it from potential environmental stresses and pests. If you live in an area where temperatures can drop significantly, consider providing a protective layer of mulch around the base of the tree to insulate the roots.

In regions with heavy rain or high humidity, ensure good drainage around the tree to prevent waterlogging and root rot. Also, the tree must be regularly inspected for any signs of pests or diseases and address any issues promptly. Use appropriate organic or chemical treatments to protect the tree from infestations or infections if needed.

Propagating Soursop

Propagating soursop involves methods to grow new plants from existing ones. The two main methods for propagating soursop are from soursop seeds and cuttings. As we have already discussed seed propagation, here's how you can grow it from a cutting-

Step 1: Choose a Healthy Cutting

First, select a healthy, semi-hardwood cutting from a mature soursop tree, ideally 6-8 inches long, with several leaves and nodes. Make sure that the cutting is free of disease and pests, as this will increase the chances of successful rooting.

Step 2: Prepare the Cutting

Next, remove any leaves from the lower half of the cutting to expose the nodes where roots will form. Then, trim the cutting to a uniform length and dip the cut end in the rooting hormone to help stimulate root growth and improve the chances of successful propagation.

Step 3: Planting

Prepare a well-draining potting mix, such as a combination of peat moss and perlite or sand. Insert the cut end of the cutting about 2-3 inches deep into the potting mix. Then, firm the soil around the cutting to ensure good contact and stability.

Step 4: Maintaining Humidity

Cover the pot with a clear plastic bag or plastic dome to create a humid environment to prevent the cutting from drying out and encourages root development. Also, ensure that the plastic does not touch the cutting to avoid mold growth.

Source : facebook

Step 5: Light and Temperature

Ideal temperatures for rooting cuttings are between 70-80°F (21-27°C). So, place the pot in a warm area with indirect sunlight but avoid direct sunlight, as it can overheat and dry out the cutting.

Step 6: Maintain Moisture

Keep the potting mix consistently moist but not waterlogged. So, check the soil regularly and water as needed to maintain adequate moisture levels. Also, avoid letting the soil dry out, as this can stress the cutting and hinder root development.

Step 7: Monitor for Roots

After a few weeks, check the cuttings for signs of root growth. Gently tug on the cutting to see if there is resistance, which indicates root formation which typically develops within 6-8 weeks, but the exact timing can vary.

Step 8: Hardening Off

Once the cuttings have developed a strong root system, gradually acclimate them to their new environment. Remove the plastic cover for increasing periods each day to help the cuttings adjust to normal humidity levels and reduce the risk of transplant shock.

Step 9: Repotting

When the cuttings are well-rooted and have outgrown their initial pots, repot them into larger containers or directly into the garden if conditions are suitable. Choose a well-draining soil mix and carefully handle the young plants to avoid damaging the roots during transplanting.

Potting and Repotting Soursop

Yes, it is possible to grow a soursop tree indoors in a pot, but it requires specific conditions to thrive. As discussed above, these trees need plenty of sunlight, so place them near a south-facing window or use grow lights to provide 6-8 hours of light daily. They also need a warm environment, ideally between 70-85°F (21-29°C).

Repotting Soursop

Repotting is necessary when the soursop plant outgrows its initial pot or if the soil quality has deteriorated. Typically, you’ll need to repot a soursop tree every 1-2 years, or when you notice that the roots are becoming root-bound or the soil is no longer draining well.

As, repotting provides the soursop with a refreshed growing environment, it also promotes continued healthy growth and fruit production. Here's how to do it-

• First, choose a pot that is 2-3 inches larger in diameter than the current one to give the roots ample room to expand. 

• Gently remove the plant from its existing pot, taking care not to damage the roots. 

• Inspect the root system and trim any that appear damaged or overly long. 

• Place the plant in the new pot, adding fresh potting mix around the roots. 

• Firm the soil gently and water thoroughly to help the plant settle into its new container. 

Harvesting Soursop fruit

Harvesting soursop fruit involves determining the right time to pick the fruit and using proper techniques to ensure the best quality and flavor.

This fruit, known for its spiky green exterior and creamy, tangy flesh, must be harvested at the correct stage of maturity to achieve its full flavor potential and optimal ripeness.

When to Harvest

Soursop fruit is typically ready for harvest when it has reached full size and the skin has turned from dark green to a lighter green or slightly yellowish color. The fruit should yield slightly to gentle pressure, indicating that it is ripe.

Harvesting usually occurs 4-6 months after flowering. So, it is essential to monitor the fruit closely as it approaches maturity, as it does not continue to ripen significantly once picked.

How to Harvest

To harvest soursop, use a sharp pair of pruning shears or a clean knife to cut the fruit from the tree, leaving a short stem attached to the fruit. Avoid pulling or twisting the fruit, as this can damage the tree and the fruit.

Handle the harvested soursop gently to prevent bruising and store it in a cool, dry place. After harvesting, the fruit can be eaten fresh, used in recipes, or refrigerated to extend its shelf life.

Types of Soursop

There are several types of soursop, each with unique characteristics that may vary in flavor, size, and texture. Here are some of the notable varieties:

Annona Squamosa (Sugar Apple)

The sugar apple, or custard apple, is another variety related to soursop. It has a more segmented, scaly skin and a sweeter taste with a custard-like consistency. The fruit is smaller and more rounded compared to soursop.

Source : instagram

Cherimoya (Annona cherimola)

Often confused with soursop, cherimoya has a similar taste but differs in appearance. It is typically smaller, with a smoother, scaly skin and a custard-like texture. The flavor is sweet with hints of pineapple, banana, and mango.

Graviola (Annona muricata)

Graviola is the most common type of soursop, known for its large, spiky green fruit and soft, white flesh. It has a tangy and slightly sweet flavor, with a creamy texture that makes it popular in juices, desserts, and smoothies.

Annona reticulata (Ratatouille or Cherimoya)

This type, sometimes referred to as the reticulated soursop, features a smoother skin compared to other soursops. It is less spiky and has a more elongated shape. The flesh is creamy and sweet, similar to other Annona species.

Annona muricata var. Edulis

A variant of the common soursop, this type is known for its particularly large fruit and higher sugar content. It is often prized for its sweeter taste and less tangy than other varieties.